
|
Do it yourself
| |||
| ||||


How to Reupholster a Car Headliner
Model: (Various brands) Various
Video tutorial
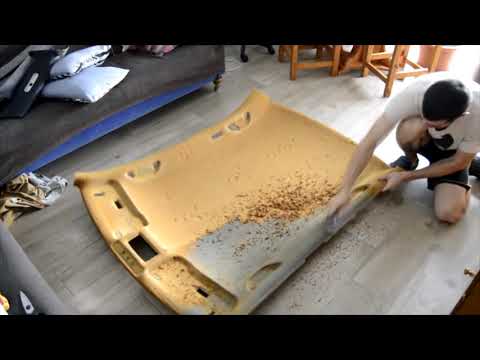
Gluing the car headliner is not advisable, as the fabric typically used consists of a sponge layer and a very lightweight fabric layer. The sponge remains attached to the cardboard, while the part that comes off is a very light mesh. The glue stains permanently, causing a very unattractive aesthetic effect. Instead, replacing it is a bit laborious but not difficult. You need to remove the headliner (which is simply a piece of pressed cardboard) by disassembling the door pillars and any handles. Place it on a large table or on the floor. The temperature for this operation should be at least 18/20 degrees Celsius. Remove all the sponge attached to the headliner with a scraper until you have a smooth surface. Lay the new fabric on top and glue it with an appropriate adhesive, which you can find on Amazon for £12.50 per tub. A specific piece of fabric measuring 1.5x2 m, also available on Amazon, can be found for £31.98 and comes in various colours. Remember to apply the fabric in small pieces, no more than 30 cm at a time, to ensure it adheres well. Fold the corners for the edges, make holes where the lights and handles are, always folding the edges inside. Allow to dry thoroughly for 48 hours. Then you can refit the headliner and reassemble the vehicle.
Updated on 19 July 2026 by ScegliAuto
Related tutorials
(Various brands) Various
If the headlining of your car has come loose and sagged, you can restore and reattach it. Refer to the instructions provided below and the video. Fir…

(Various brands) Various
This method is especially valid if you have a rather old vehicle and do not want to spend a lot of money to reupholster the headlining inside. When t…
(Various brands) Various
In this video, you will see how the YouTuber managed to do an excellent job reupholstering the headliner of their car (it appears to be a Polo), with…
Other guides you may be interested in
|
Frequently Asked QuestionsHow to Remove the Toll Tag Holder from the Car Windscreen
The toll tag holder is usually attached to the car windscreen to ensure that the toll tag functions immediately when passing through barriers. However, if you decide to remove the holder, you should follow this procedure: - Insert the toll tag into the holder; - Pull the holder inwards to detach it from the windscreen; you can use a glass scraper or a stiff plastic card to assist you; After removing the holder, it is essential to remove the adhesive from the windscreen. To remove the adhesive, we recommend using a solvent-based spray that will remove the glue without clouding the area. by ScegliAuto More videos
|
|
For advertising on this site Write to info@scegliauto.com
ScegliAuto is not responsible for any inaccuracy of the data in the lists. To report any inaccuracy or your business (if you own the business in question), please write to info@scegliauto.com
Number of seconds to generate the page: 0.015
(c) ScegliAuto 2026 - info@scegliauto.com - Privacy policy VAT number: IT01247470535 |
