
|
Do it yourself
| |||
| ||||


Volkswagen Golf - Video tutorial
Model: Volkswagen Golf
Golf 3, Golf III, MK 3
- Years 1991-1997 In this video we will see the main steps to disassemble and replace the thermostatic valve on the third generation Volkswagen Golf. First of all we lift the car and start by removing the various lower protections; after that we go to remove our belt connected to the water pump, loosening the bolt of the pretensioner. At this point we unscrew the screws and disconnect the thermostat pipes, letting all the liquid drain into a container; now let's take the whole piece apart and replace it with the new one, reassembling everything. Finally, let's pour in the new coolant!
Posted on 30 May 2022 by ScegliAuto
Other guides that may interest you
|
Frequently Asked QuestionsHow to set the time on the Peugeot 308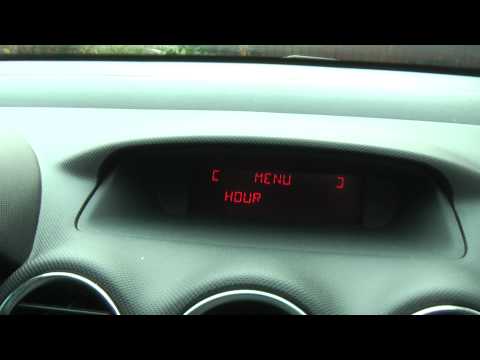
If we need to change the time on this car we can follow the instructions given in this video tutorial and read the instructions below. First of all, access the driver's seat and turn on the ignition. On the right multifunction lever there are the controls with the arrows to scroll the various menu functions and scroll the various functions up to "display adjust", after which press the button behind the lever to change the time, once set the new value press again the key with the arrow indication and modify the minutes in this way the work will be completed. by ScegliAuto More videos
|
|
For advertising on this site Write to info@scegliauto.com
ScegliAuto is not responsible for any inaccuracy of the data in the lists. To report any inaccuracy or your business (if you own the business in question), please write to info@scegliauto.com
Number of seconds to generate the page: 0.009
(c) ScegliAuto 2024 - info@scegliauto.com - Privacy Policy VAT number: IT01247470535 |