
|
Do it yourself
| |||
| ||||


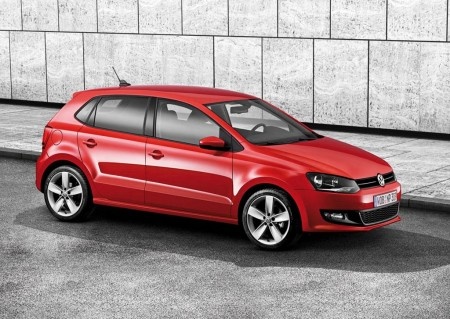
How to Install a LED Light in the Boot of a Volkswagen Polo
Model: Volkswagen Polo
Polo 5, Polo V, MK 5, MK V, 6R
- Years 2009-2017
The first thing to do for this job is to remove the parcel shelf, which gets in the way: to remove the light unit, use a plastic trim tool instead of a knife to avoid damaging it. Once removed from its housing, disconnect the connector and replace it with the new LED light unit: you can find them online, such as those from Hella for £8.89, or purchase them at any car parts store. Simply reconnect the connector and refit it back into its housing; in the case of the YouTuber, the light unit was slightly smaller, so they had to insert a small spacer, which is not noticeable once finished.
Updated on 19 July 2026 by ScegliAuto
Video tutorial
Related tutorials
Volkswagen Polo
(2017-2025 /
Polo VI, Polo 6, MK 6, AW1, MK VI)
Note that the work described here is identical between the Volkswagen Polo 6 and the Volkswagen Polo 5, which is why the proposed video shows a Volks…

Volkswagen Polo
(2001-2009 /
MK IV, Polo IV, Polo 4, MK 4, 9N)
In this new mini guide dedicated to all of you who own a Volkswagen Polo Mk4, we will discover the various steps to follow if you want to replace the…

Volkswagen Polo
(1994-2003 /
MK III, Polo III, Polo 3, MK 3, 6N)
Replacing the third brake light of the Volkswagen Polo is a simple and quick operation to be carried out independently. To perform the replacement, w…
Other guides you may be interested in
|
Frequently Asked QuestionsHow to Replace the External Wing Mirror on a Ford C MAX
In the event of a breakage, it will be necessary to replace the external wing mirror on the 2011 Ford C MAX. This operation is easily performed independently. Start by removing the internal cover of the mirror with a plastic lever. Then, use a socket wrench to remove the securing pins. Once the pins are removed, you can take off the mirror, but not before disconnecting the power connectors. Then proceed to fit the new mirror. First, connect the connectors and then secure the mirror to its housing with the pins. Refit the plastic cover and test the operation of the electric mirror using the controls. by ScegliAuto More videos
|
|
For advertising on this site Write to info@scegliauto.com
ScegliAuto is not responsible for any inaccuracy of the data in the lists. To report any inaccuracy or your business (if you own the business in question), please write to info@scegliauto.com
Number of seconds to generate the page: 0.064
(c) ScegliAuto 2026 - info@scegliauto.com - Privacy policy VAT number: IT01247470535 |
