
|
Do it yourself
| |||
| ||||


|
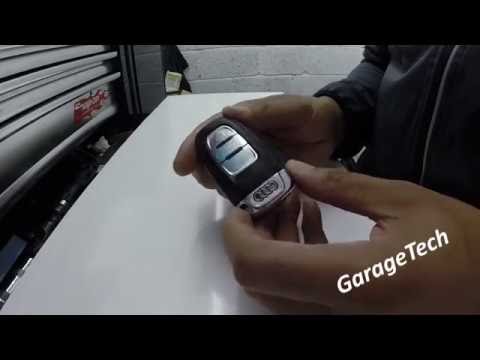
To replace the battery in an Audi key, prepare a new button battery that matches the installed one (check the code directly on the battery) and a thin plastic tool to pry without marking the casing. Work on a clean surface. Locate the seam between the two halves of the shell and gently open the key with a light and progressive lever, starting from a convenient opening point. If the key has a mechanical emergency insert, it may be helpful to remove it for better grip and to reach the separation point of the shell more easily. Once opened, access the battery compartment. Before removing the battery, observe the orientation of the terminals ("+" side and "-" side) and install the new battery in the same direction, ensuring it is well seated and locked in place. Avoid touching the surface of the battery with your fingers for long: if possible, handle it by the edges. Close the shell by properly aligning the two halves and press along the perimeter until the clips snap back into place. After finishing, check that the buttons respond and that the car recognizes the key. If the key continues to indicate a low battery, verify that the battery is the correct one and that the contact in the battery compartment is clean and making good pressure.
Posted on 30 July 2026 by ScegliAuto
Video tutorial
Related tutorials
Audi A6
(1997-2004 /
MK 2, C5)
How do you change the battery in the key for an Audi A6? Let’s see how to remove the battery from the Audi key if it is dead or irreparably damaged. …

Audi A6
(2004-2012 /
MK 3, C6)
In the following article, we will explain the procedure for replacing the battery of the Audi A6 C6 key. For this operation, you will need a flathead…
Audi A6
(2011-2018 /
C7, MK 4)
Before starting, press the button located on the top of the key for your Audi A6. Begin by extracting and removing the physical key from inside the e…
Other guides you may be interested in
|
How to Check the Oil Level on a Jeep Renegade?
To check the oil level on a Jeep Renegade, you need to open the bonnet to access the components inside the engine bay: on the lower left side of the engine block, you will find the dipstick for checking the level. This should be pulled out and thoroughly cleaned with a cloth: once cleaned, reinsert it back into its tube and pull it out immediately after. This way, you can check that the oil mark is between the minimum and maximum levels; finally, you can place the dipstick back in its tube. by ScegliAuto More videos
|

|
For advertising on this site Write to info@scegliauto.com
ScegliAuto is not responsible for any inaccuracy of the data in the lists. To report any inaccuracy or your business (if you own the business in question), please write to info@scegliauto.com
Number of seconds to generate the page: 0.158
(c) ScegliAuto 2026 - info@scegliauto.com - Privacy policy VAT number: IT01247470535 |
