
|
Do it yourself
| |||
| ||||


Guide to Installing Xenon Headlights
Model: Audi A4
B6
- Years 2000-2004
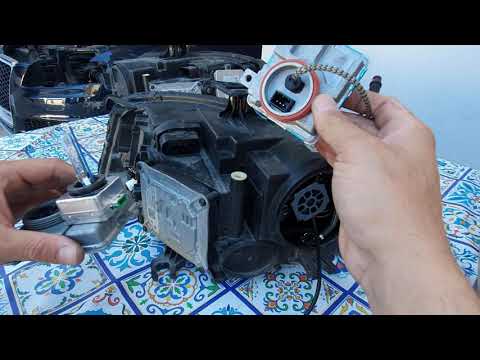
This guide shows how to install an aftermarket xenon headlight kit.
Provided that the installation complies with legal requirements set by traffic regulations (projector headlights, headlight washers, automatic leveling), the final effect is quite impressive, and it significantly improves visibility. The installation involves removing the front headlights and installing the ballast (the control unit that manages this type of headlights) and the new bulb. The car in the video is an Audi A4, but the installation is similar for many other models.
Updated on 2 February 2026 by ScegliAuto
Video tutorial
Related tutorials
Audi A4
(2007-2016 /
B8)
In this video we can see one of the reasons why one of the Xenon headlights of an Audi A4 stopped working. It is not necessarily due to a burnt out b…
Audi A4
(2007-2016 /
B8)
To be able to replace the xenon bulbs on the Audi A4 B8, the entire headlight assembly must be removed. To do this, lift the hood and loosen the four…
Audi A4
(2000-2004 /
B6)
You can purchase not only xenon bulbs in the aftermarket but also the projector that will give the headlight, in addition to better efficiency, an ap…
Other guides you may be interested in
|
Installation of Upgraded Intercooler Radiator with Pipes
Lift the vehicle on suitable axle stands, remove the front wheels, and then the front bumper and grille. Proceed to remove the front headlights; drain the coolant, remove the intercooler radiator and the hoses connecting it to the intake system. Position the new intercooler radiator in the grille, temporarily securing it with cable ties, and mark with a marker the part of the metal that needs to be removed to allow the new hoses to pass through. Cut the marked portion of metal and apply a gasket to the edge. Remove the inner cover of the bumper and position it near the radiator to identify any interfering parts to eliminate: again, apply a gasket to the edge of the cut. Create brackets for securing the new radiator and proceed with the installation of the connecting pipes from the radiator to the intake, shaping and connecting them appropriately. Finally, reassemble the bumper, headlights, and grille. by ScegliAuto More videos
|
|
For advertising on this site Write to info@scegliauto.com
ScegliAuto is not responsible for any inaccuracy of the data in the lists. To report any inaccuracy or your business (if you own the business in question), please write to info@scegliauto.com
Number of seconds to generate the page: 0.050
(c) ScegliAuto 2026 - info@scegliauto.com - Privacy policy VAT number: IT01247470535 |