
|
Do it yourself
| |||
| ||||


Removing the Car Radio and Various Dashboard Parts, and Installing the GPS Navigator
Model: BMW Serie 3
E46
- Years:
1998, 1999, 2000, 2001, 2002, 2003, 2004, 2005, 2006
Video tutorial
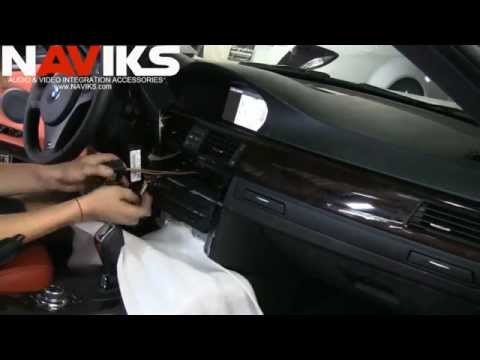
Using a medium-sized flathead screwdriver, pry off the dashboard trim. Unscrew the fastening screw of the side air duct and remove it. Take off the frame around the car radio and pull out the radio itself. Then, pull out the climate control display by pulling it forward and disconnect the connectors attached to it. Next, remove the glove compartment. Unscrew the fastening screws of the radio support frame and the display, and remove it from its location to later install the GPS navigator. Detach the center air duct, pull it out, and place it on the dashboard. Now, with a very small flathead screwdriver, detach the cover at the center of the windshield pillar trim: once the cover is removed, three screws will be visible that need to be unscrewed, allowing you to detach the trim from the pillar and slide it out from the edge of the dashboard using a lever. Detach the courtesy light fixture from the headliner and route the microphone cables for the Bluetooth system and the GPS antenna so that the microphone is positioned near the light fixture and the antenna is on the windshield, just at the exit of the pillar, and converge all the connection jacks inside the radio compartment. Make all connections following the provided wiring diagram, and securely fasten the wiring, placing the navigator in its location: the climate control display should be positioned in place of the glove compartment. Finally, complete the installation by reassembling everything that was previously removed.
Updated on 3 February 2026 by ScegliAuto
Related tutorials
BMW Serie 3
(1998-2006 /
E46)
Start by gently removing the plastic trim on the sides of the tunnel using a plastic tool to avoid damaging the bodywork. Remove the screws from the …

BMW Serie 3
(1998-2006 /
E46)
Want to remove and replace the car radio in your BMW? Let's see how to take it out from the dashboard plastics. Remove the trim above the dashboard: …
BMW Serie 3
(2005-2013 /
E92, E90, E91)
Using a plastic tool to avoid damaging the body, pry on the air vent and woodgrain dashboard to lift it. Remove the radio control panel, being carefu…
Other guides you may be interested in
|
How to Remove the Rear Seat of a Hyundai Tucson?
To remove the rear seat of a Hyundai Tucson, follow these steps. Start by moving the front seats to their most forward position to gain space. Next, locate the release lever on the underside of the rear seat, near the floor. Press this lever down while pulling the seat upwards to unlock it from the anchor pins. Once unlocked, tilt the seat upwards and forwards to remove it from its position. Repeat this process for both sides of the rear seat. Be careful of any electrical cables or components that may be connected to the seat during removal. Once the rear seat is removed, the disassembly is complete. by ScegliAuto More videos
|
|
For advertising on this site Write to info@scegliauto.com
ScegliAuto is not responsible for any inaccuracy of the data in the lists. To report any inaccuracy or your business (if you own the business in question), please write to info@scegliauto.com
Number of seconds to generate the page: 0.020
(c) ScegliAuto 2026 - info@scegliauto.com - Privacy policy VAT number: IT01247470535 |
