
|
Do it yourself
| |||
| ||||


Citroen Ds3 - Front bumper Citroen Ds3 (2010-2019 / MK 1)
How to remove the front bumper on the Citroen DS3 In today's video tutorial we will see how to remove the front bumper and headlights of the Citroen DS3 first series, in simple steps. First of all we open the …read all… Posted on 18 June 2022 by ScegliAuto 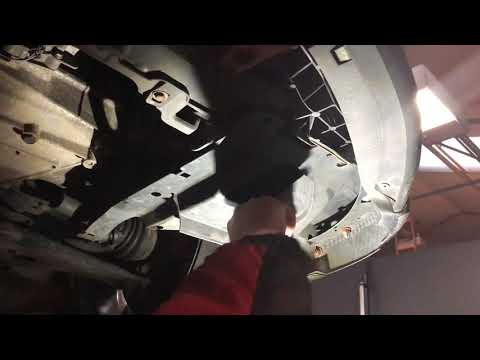 Citroen Ds3 (2010-2019 / MK 1)
Guide to remove the front bumper of the Citroen DS3 Let's find out in this guide how to remove the front bumper of the Citroen DS3, following the instructions below. First of all, we open the bonnet and unscrew …read all… Posted on 6 April 2024 by ScegliAuto 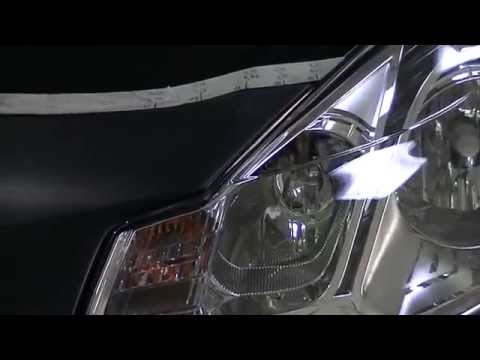 Citroen Ds3 (2010-2019 / MK 1)
Citroen DS3 front bumper installation In case of breakage or serious damage of the front bumper, it can be decidedly advantageous, both from an economic point of view and from that of the aesthetic …read all… Posted on 7 September 2023 by ScegliAuto Airbags (1) Shock absorbers (1) Car stereo (3) Battery (5) Gearbox (1) Key (6) Timing belt (1) Air conditioning (1) -board computer (4) Checks and maintenance (18) Dashboard (1) Brake discs (1) Tail light (2) Air filter (1) Cabin air filter (1) Petrol filter (1) Diesel filter (4) Accessory Kit (2) Light bulb (1) Headlight bulb (6) Rear light bulb (1) Door panel (2) Front bumper (3) Tires (7) Instrument cluster (2) Fuse box (8) Windscreen wipers (1) Interior blower (1) Side window (1) |
How to adjust the time and date of the Peugeot 3008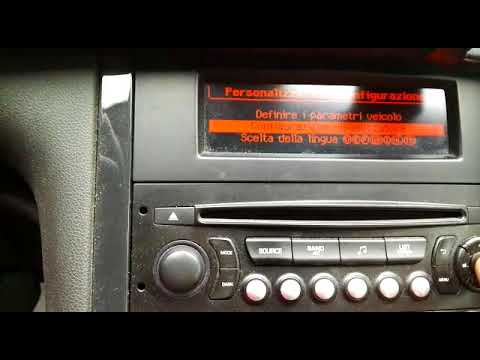
To set the time on the Peugeot 3008 you must use the radio controls on the dashboard; let's start by pressing the "menu" key, with the arrow to the right or left we go to "personalization-configuration" and press the "ok" key; use the down or up arrow to go to "viewer configuration" and press the "ok" button; use the up or down arrow to go to "time and date setting" and press the "ok" button; now we can start changing the date first, moving the arrow down or up, to change the day first, then the month, then the year, then the hour, then the minutes and finally the time format by confirming each selection with the "ok" key. by ScegliAuto More videos
|
|
For advertising on this site Write to info@scegliauto.com
ScegliAuto is not responsible for any inaccuracy of the data in the lists. To report any inaccuracy or your business (if you own the business in question), please write to info@scegliauto.com
Number of seconds to generate the page: 0.007
(c) ScegliAuto 2024 - info@scegliauto.com - Privacy Policy VAT number: IT01247470535 |