
|
Do it yourself
| |||
| ||||


How to change the cabin air filter of the Dacia Sandero.
Model: Dacia Sandero
B8
- Years 2012-2020
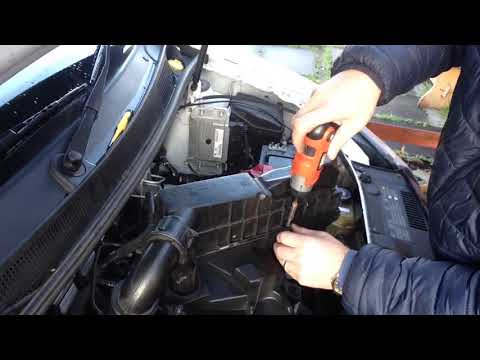
On the Dacia Sandero, the replacement of the cabin filter is done from the passenger side, in the lower area of the dashboard. Work with the engine off, the handbrake engaged, and the passenger seat pushed back for space. In the Dacia Sandero, locate the filter housing in the passenger footwell and open the cover by manipulating the closing tabs, without forcing the plastic. Once opened, gently pull out the old cabin filter in a controlled motion to avoid spreading dust and debris. If the area is dirty, carefully clean the Dacia Sandero's housing with a cloth or with light suction, avoiding pushing dirt towards the ducts. Before inserting the new filter, check the installation direction: the cabin filter usually has arrows/indications for airflow. Insert the new filter into the Dacia Sandero following the same orientation, ensuring it fits properly without any unusual bends. Close the housing cover until it clicks shut. Once the job is finished, start the cabin ventilation in the Dacia Sandero and check that the airflow is smooth and that there are no vibration noises due to an improperly positioned filter.
Posted on 24 December 2025 by ScegliAuto
Video tutorial
Related tutorials
Dacia Sandero
(2008-2012 /
BS)
In the following guide, we will explain step by step how you can replace the engine air filter of your first series Dacia Sandero by yourself. First …
Dacia Sandero
(2008-2012 /
BS)
How to replace the engine air filter on a Dacia Sandero? Follow this procedure: open the car door, pull up the engine compartment release lever locat…

Dacia Sandero
(2012-2020 /
B8)
The air filter for the Dacia Sandero 2 costs around £10, so by replacing it yourself instead of going to a garage, you can save significantly on labo…
Other guides you may be interested in
|
How to Open the Bonnet of a Renault Megane if the Lever is Broken?
If the lever that unlocks the bonnet of the Renault Megane is broken or not functioning, there is an emergency procedure to unlock the mechanism: remove the right front grille located at the top of the bumper. Once the grille is removed, you can locate the actuator mechanism: by pulling the spring in this position, you can unlock the actuator, allowing you to lift the bonnet and access the components located inside the engine compartment. You can then close the bonnet simply by lowering it. by ScegliAuto More videos
|

|
For advertising on this site Write to info@scegliauto.com
ScegliAuto is not responsible for any inaccuracy of the data in the lists. To report any inaccuracy or your business (if you own the business in question), please write to info@scegliauto.com
Number of seconds to generate the page: 0.411
(c) ScegliAuto 2026 - info@scegliauto.com - Privacy policy VAT number: IT01247470535 |
