
|
Do it yourself
| |||
| ||||


Dacia Duster - Video tutorial
Model: Dacia Duster
HS, MK 1
- Years 2010-2017 Below are the general steps to replace the horn of the Dacia Duster: Find the horn location: Usually, the horn is located under the hood or behind the front grille of the car. You can consult the owner's manual to pinpoint the exact location of the horn in your Duster model. Disconnect the battery: Before proceeding, disconnect the negative battery cable to avoid short circuits during the replacement. Make sure you know how to properly reattach the cable later. Remove panels or bumper (if necessary): Depending on the horn's location, you may need to remove some panels or the bumper to access it. Follow the manual instructions to safely disassemble these parts. Disconnect the electrical cable: Once you reach the horn, you will find an electrical cable connected to it. Disconnect it by gently pulling the connector. Make sure to remember exactly how it is connected so you can reinstall it correctly later. Remove the old horn: It should be securely attached to the car's structure with screws or brackets. Use the appropriate tools to remove the old horn. Install the new horn: Secure the new horn in the correct position and tighten the screws or brackets to hold it in place. Connect the electrical cable: Reconnect the electrical cable to the new horn, making sure it is inserted correctly. Reassemble panels or bumper: If you removed panels or the bumper to access the horn, reassemble them following the manual instructions. Reconnect the battery: Reconnect the negative battery cable and make sure it is tightly secured. Test the horn: After completing the installation process, start the engine and test the new horn to ensure it functions properly.
Posted on 24 March 2024 by ScegliAuto
Other guides that may interest you
|
Frequently Asked QuestionsHow to reset the TPMS light of the Volkswagen Polo 2011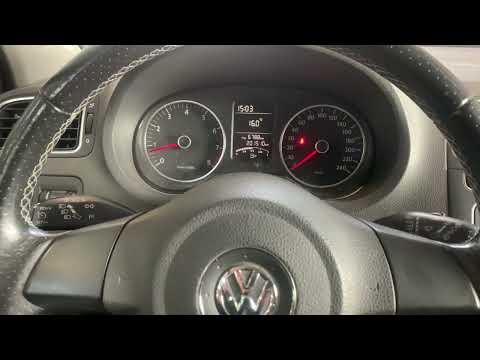
The orange tire light indicates the presence of one or more tires with an inflation pressure below the recommended limit. All this is easily solved by inflating them correctly or replacing them in the event of a puncture. After carrying out these operations it is necessary to reset the warning light and therefore also the sensor in order to have new reading data. All you have to do is start the car ignition and then fully open the glove compartment on the passenger side. Locate the two buttons in the right corner and press "Set". At this point the reset is complete and you can turn off the ignition. by ScegliAuto More videos
|
|
For advertising on this site Write to info@scegliauto.com
ScegliAuto is not responsible for any inaccuracy of the data in the lists. To report any inaccuracy or your business (if you own the business in question), please write to info@scegliauto.com
Number of seconds to generate the page: 0.064
(c) ScegliAuto 2024 - info@scegliauto.com - Privacy Policy VAT number: IT01247470535 |