
|
Do it yourself
| |||
| ||||


Let's see how to change the front brake pads on the Fiat Panda III.
Model: Fiat Panda
MK 3, 319
- Years 2012-2024
To replace the front brake pads of the Fiat Panda III, we start by opening the brake fluid cap, loosening the wheel bolts, and then lifting the vehicle. We remove the wheel and turn the brake disc outward. We insert a flathead screwdriver between the old pad and the caliper; we leverage it to push back the piston, creating space for the new pads. We remove the support spring, take off the caps from the caliper bolts, unscrew the two Allen bolts of the caliper, and remove the caliper without pulling on the hose. We take out the old pads with a screwdriver, clean the bracket with a wire brush, apply copper grease only on the edges of the new pads, mount the pads on the piston side, and reattach the caliper by hand-tightening the bolts, then tightening them with a torque wrench. We put the caliper caps back on, reattach the support spring, and repeat everything on the other side. We reassemble the wheels, lower the car, and screw the brake reservoir cap back on.
Posted on 23 December 2025 by ScegliAuto
Video tutorial
Related tutorials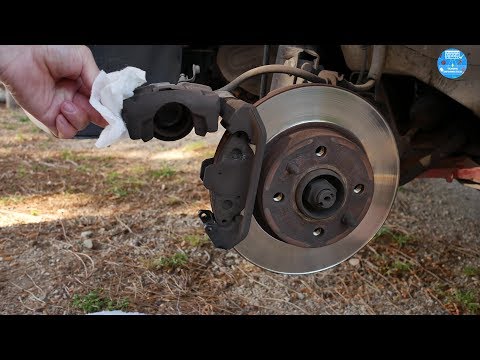
Fiat Panda
(2003-2012 /
169, MK 2)
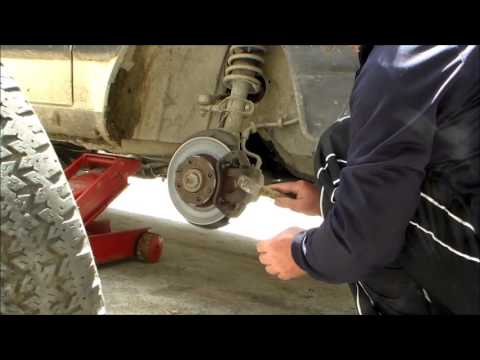
Let's see how to replace the front brake pads on a Fiat Panda. We raise the car on a column point (jack) to the desired height, immediately after we …

Fiat Panda
(2003-2012 /
169, MK 2)
Let's see in this video the steps that will allow us to remove and replace the front brake pads on the Fiat Panda 169, second series. First we go to …
Fiat Panda
(1980-2003 /
MK 1, 141)
Disassembly of the worn front disc brake pads worn out on a Fiat Panda disc, let's see the replacement. We lift the car on a jack to the desired heig…
Other guides you may be interested in
|
How to Replace the Pollen Filter on a Jeep Renegade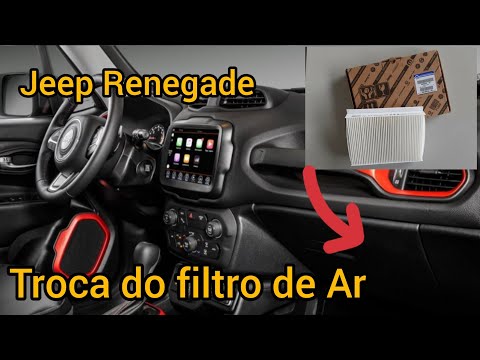
How to replace the pollen filter on a Jeep Renegade? Unscrew the screws located on the right side of the dashboard, then remove the glove compartment (as shown in the video). Using a screwdriver or cordless drill, remove the metal bar and the cover from the filter housing, then extract the worn cabin filter. Insert a new cabin filter ensuring it fits snugly around the walls of the housing, reattach the housing cover and tighten the screws (cover everything with the cloth placed under the dashboard). Check the correct installation of the previously mounted parts. by ScegliAuto More videos
|

|
For advertising on this site Write to info@scegliauto.com
ScegliAuto is not responsible for any inaccuracy of the data in the lists. To report any inaccuracy or your business (if you own the business in question), please write to info@scegliauto.com
Number of seconds to generate the page: 0.065
(c) ScegliAuto 2026 - info@scegliauto.com - Privacy policy VAT number: IT01247470535 |