
|
Do it yourself
| |||
| ||||


How to replace the timing belt on Geely Ck
Model: Geely Ck
MK 1
- Years 2005-2016
Today we will see the main instructions that will allow us to disassemble and replace the Geely Ck timing belt. First of all we open the bonnet and start disassembling the spark plug connections; we unscrew the fixing screws of the cylinder head cover to remove it, also removing the timing cover and the spark plugs, as shown in the video. At this point we take the references necessary to replace the timing belt; replace the belt with the new one and reassemble everything, installing it in the correct direction and reassembling the cylinder head cover!
Posted on 10 February 2023 by ScegliAuto
Video tutorial
Related tutorials
Geely Ck
(2005-2016 /
MK 1)
Let's see below the procedure on how to replace the coolant of the Geely Ck, following the instructions below. First of all, let's move to the front …

Geely Ck
(2005-2016 /
MK 1)
In order to replace the Geely CK starter motor, you need to open the hood, so that you have access to the components inside the engine compartment: t…
Geely Ck
(2005-2016 /
MK 1)
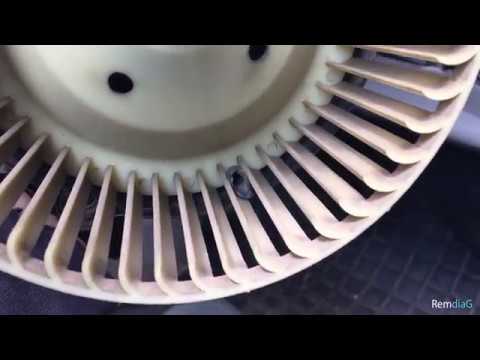
In this guide, we will see the main steps that will allow us to disassemble and replace the cabin fan of the Geely CK, following the instructions bel…
Other guides you may be interested in
|
How to Remove the Door Panel from a Renault Modus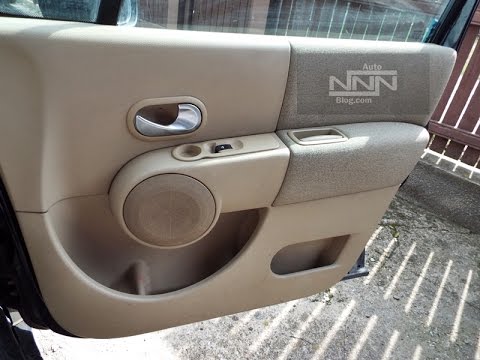
How to remove the door panel from a Renault Modus? Follow this video to see how to proceed. Before starting the disassembly, disconnect the battery terminals located in the engine bay. Begin disassembly: remove the satin screw covers located on the door opening lever, use a screwdriver to unscrew the screw, and unscrew the screws located in the handle. Once removed, also unscrew the one around the door panel. Detach the door panel, disconnect the window regulator and speaker connectors. Do not lose any of the clips located behind the plastic panel that was removed first. Now that the door panel is removed, peel off the adhesive covering from the metal and work on the pieces to be removed. Finally, reassemble everything in reverse order. by ScegliAuto More videos
|

|
For advertising on this site Write to info@scegliauto.com
ScegliAuto is not responsible for any inaccuracy of the data in the lists. To report any inaccuracy or your business (if you own the business in question), please write to info@scegliauto.com
Number of seconds to generate the page: 0.079
(c) ScegliAuto 2026 - info@scegliauto.com - Privacy policy VAT number: IT01247470535 |