
|
Do it yourself
| |||
| ||||


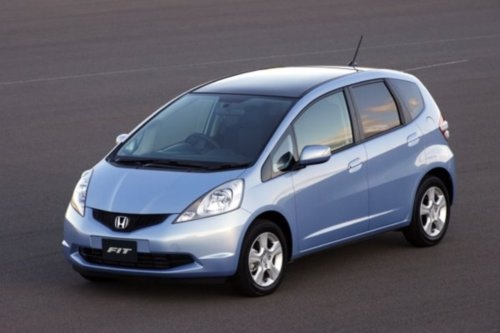
Rain Guard Kit for Windows
Model: Honda Jazz
MK 2
- Years:
2008, 2009, 2010, 2011, 2012, 2013
Video tutorial
To start the installation of your kit, remove the glass seal, but only at the top. To ensure correct installation of the kit, apply an adhesive strip with hooks about ten centimetres down from the top corner. Before repositioning the seal, apply two hooks about ten centimetres down from the top corner. Now take measurements for the correct positioning of the kit and clean the car body with alcohol where the kit will be placed. Lift a flap on the double-sided tape on the kit's bracket, align it on the bodywork, and remove the protective covering from the adhesive. Press it down to fix the part to the car body using small screws that will engage with the pre-installed hooks. Repeat the operation on all doors.
Updated on 8 February 2026 by ScegliAuto
Related tutorials
Honda Jazz
(2008-2013 /
MK 2)
Position the vehicle on a lift and, after marking the fixing points with a marker and the template provided in the kit, drill at the marked points to…

Honda Jazz
(2013-2019 /
MK 3)
Let’s see how to easily install sports pedals on the Honda Jazz. We found these same pedals in the video on the A4h-tech website with the code 08U74-…

Honda Jazz
(2008-2013 /
MK 2)
The necessary tools are a drill and a rivet gun with a set of rivets. After obtaining the necessary kit for the operation, begin by drilling three ho…
Other guides you may be interested in |
How to Remove the Rear Seat of a Hyundai Tucson?
To remove the rear seat of a Hyundai Tucson, follow these steps. Start by moving the front seats to their most forward position to gain space. Next, locate the release lever on the underside of the rear seat, near the floor. Press this lever down while pulling the seat upwards to unlock it from the anchor pins. Once unlocked, tilt the seat upwards and forwards to remove it from its position. Repeat this process for both sides of the rear seat. Be careful of any electrical cables or components that may be connected to the seat during removal. Once the rear seat is removed, the disassembly is complete. by ScegliAuto More videos
|
|
For advertising on this site Write to info@scegliauto.com
ScegliAuto is not responsible for any inaccuracy of the data in the lists. To report any inaccuracy or your business (if you own the business in question), please write to info@scegliauto.com
Number of seconds to generate the page: 0.021
(c) ScegliAuto 2026 - info@scegliauto.com - Privacy policy VAT number: IT01247470535 |
