
|
Do it yourself
| |||
| ||||



Radiator Replacement and Maintenance
Model: Honda CR-V
MK 3
- Years:
2007, 2008, 2009, 2010, 2011, 2012
Video tutorial
Locate the radiator drain tap, which is situated exactly at the centre of the underside of the front bumper. Open it with pliers and ensure you have a catch tray to avoid making a mess. Now, lift the bonnet and remove all the clips on the panel at the top of the radiator. Next, remove the bolts securing the bonnet latch system; without disconnecting any connectors, move it to a position where it won't obstruct. Now, start removing all the various supports that would block the radiator's removal. Remove the ties securing the hoses connected to the radiator and take them off. Before removing the bolts securing the radiator, treat them with lubricant. Disconnect all connectors related to the fan and various sensors, then unscrew the radiator bolts. Now, initially remove the radiator cooling fan, and then proceed to disconnect the hoses at the bottom of the radiator and the last connectors. You can now proceed to remove the radiator.
Updated on 23 February 2026 by ScegliAuto
Related tutorials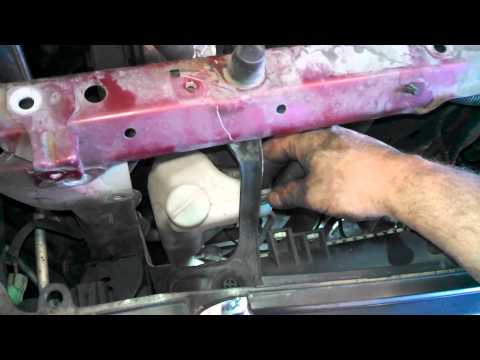
Honda CR-V
(2002-2007 /
MK 2)
This video shows how to remove and replace the radiator fan on your car. First, remove anything that obstructs the work; you need to remove the front…

Honda CR-V
(2007-2012 /
MK 3)
In this video, see how to remove the radiator along with the cooling fans of a Honda CR-V. Open the bonnet and secure it, then detach the plastic riv…

Honda CR-V
(2002-2007 /
MK 2)
This video illustrates step by step how to carry out proper maintenance on our car, highlighting the care needed for checking the rear differential. …
Other guides you may be interested in
|
How to Remove the Rear Seat of a Hyundai Tucson?
To remove the rear seat of a Hyundai Tucson, follow these steps. Start by moving the front seats to their most forward position to gain space. Next, locate the release lever on the underside of the rear seat, near the floor. Press this lever down while pulling the seat upwards to unlock it from the anchor pins. Once unlocked, tilt the seat upwards and forwards to remove it from its position. Repeat this process for both sides of the rear seat. Be careful of any electrical cables or components that may be connected to the seat during removal. Once the rear seat is removed, the disassembly is complete. by ScegliAuto More videos
|
|
For advertising on this site Write to info@scegliauto.com
ScegliAuto is not responsible for any inaccuracy of the data in the lists. To report any inaccuracy or your business (if you own the business in question), please write to info@scegliauto.com
Number of seconds to generate the page: 0.031
(c) ScegliAuto 2026 - info@scegliauto.com - Privacy policy VAT number: IT01247470535 |
