
|
Do it yourself
| |||
| ||||


Using a Scanner to Turn Off the Engine Warning Light on the Dashboard
Model: Mercedes Classe M
W163
- Years 1997-2005
In the following images, you can see the engine warning light illuminated. With the appropriate scanner, you can check the code and type of faults detected by the ECU. The scanner, as shown in the images, should be connected to the socket located above the pedal box. Once connected, turn the ignition key and wait a few minutes. In this case, the scanner detected ten error codes all related to misfires, meaning the spark plug is not firing or is firing late. Try to erase the codes detected by the scanner after noting them down. Take the car for a test drive to check if the light has turned off. Then try scanning again to see if the same error codes are detected. If so, examine the affected parts of the engine more closely. Car model: Mercedes ML320.
Updated on 11 February 2026 by ScegliAuto
Video tutorial
Related tutorials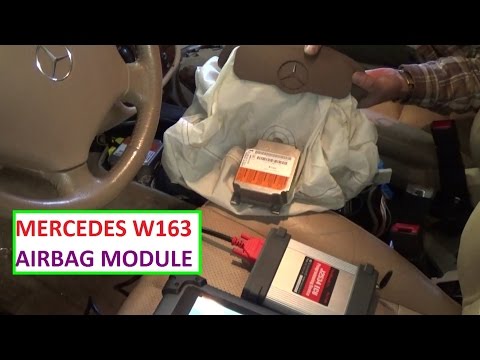
Mercedes Classe M
(1997-2005 /
W163)
If the driver airbag (check the condition of the seatbelt pretensioner as well) has deployed after a collision, specifically the one located at the c…

Mercedes Classe M
(1997-2005 /
W163)
To clear the Service light from the instrument panel of the Mercedes M-Class, you need to turn on the display by inserting the ignition key into the …

Mercedes Classe M
(2011-2018 /
W166)
On vehicles equipped with the AdBlue system, such as the Mercedes in the video, the most common problems are: low AdBlue level or poor-quality fluid …
Other guides you may be interested in
|
How to Replace the External Wing Mirror on a Ford C MAX
In the event of a breakage, it will be necessary to replace the external wing mirror on the 2011 Ford C MAX. This operation is easily performed independently. Start by removing the internal cover of the mirror with a plastic lever. Then, use a socket wrench to remove the securing pins. Once the pins are removed, you can take off the mirror, but not before disconnecting the power connectors. Then proceed to fit the new mirror. First, connect the connectors and then secure the mirror to its housing with the pins. Refit the plastic cover and test the operation of the electric mirror using the controls. by ScegliAuto More videos
|
|
For advertising on this site Write to info@scegliauto.com
ScegliAuto is not responsible for any inaccuracy of the data in the lists. To report any inaccuracy or your business (if you own the business in question), please write to info@scegliauto.com
Number of seconds to generate the page: 0.693
(c) ScegliAuto 2026 - info@scegliauto.com - Privacy policy VAT number: IT01247470535 |
