
|
Do it yourself
| |||
| ||||


How to Refit the Poly-V Belt
Model: Mercedes Classe M
W163
- Years:
1997, 1998, 1999, 2000, 2001, 2002, 2003, 2004, 2005
Video tutorial
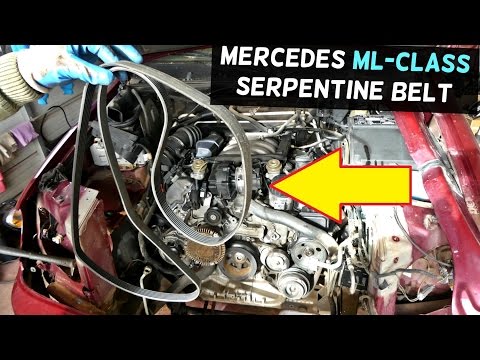
Below are some brief sequences of images to show you how to refit the poly-V belt. In this particular case, the cooling fan is not present as it was removed earlier for other reasons, and it is not necessary to remove it to refit the belt. To begin, position the belt on the power steering pulley and then on the air conditioning pulley. Now pass it around the crankshaft pulley and back over the tensioner. From here, reach the alternator by passing over the water pump, but first, lower the belt from the idler pulley above the water pump. At this point, apply a twist to the tensioner (anti-clockwise) to loosen the tension and reposition the belt on the pulley. Car model: Mercedes W163 M-Class Required tools: 17mm socket wrench.
Updated on 15 February 2026 by ScegliAuto
Related tutorials
Mercedes Classe M
(2005-2011 /
W164)
Today, learn how to replace the timing belt of the Mercedes M-Class. First, remove the air intake hose. To remove the hose, insert a flat screwdriver…

Mercedes Classe M
(2005-2011 /
W164)
In this tutorial, you will see how to replace the auxiliary belt on a Mercedes M-Class, a very simple and quick operation. First, ensure the engine i…
Mercedes Classe M
(1997-2005 /
W163)
The auxiliary belt (or service belt) is driven by the crankshaft pulley and operates the alternator, air conditioning compressor, power steering pump…
Other guides you may be interested in
|
How to Remove the Rear Seat of a Hyundai Tucson?
To remove the rear seat of a Hyundai Tucson, follow these steps. Start by moving the front seats to their most forward position to gain space. Next, locate the release lever on the underside of the rear seat, near the floor. Press this lever down while pulling the seat upwards to unlock it from the anchor pins. Once unlocked, tilt the seat upwards and forwards to remove it from its position. Repeat this process for both sides of the rear seat. Be careful of any electrical cables or components that may be connected to the seat during removal. Once the rear seat is removed, the disassembly is complete. by ScegliAuto More videos
|
|
For advertising on this site Write to info@scegliauto.com
ScegliAuto is not responsible for any inaccuracy of the data in the lists. To report any inaccuracy or your business (if you own the business in question), please write to info@scegliauto.com
Number of seconds to generate the page: 0.069
(c) ScegliAuto 2026 - info@scegliauto.com - Privacy policy VAT number: IT01247470535 |
