
|
Do it yourself
| |||
| ||||


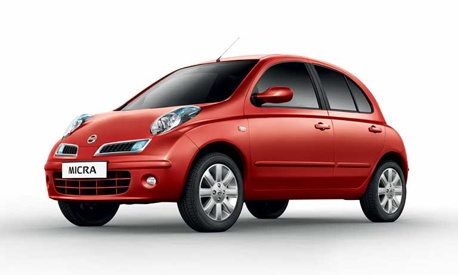
How to Replace Engine Oil and Filter on a Nissan Micra K12
Model: Nissan Micra
K12
- Years:
2002, 2003, 2004, 2005, 2006, 2007, 2008, 2009, 2010
Video tutorial
Let's see how to replace the oil and filter on a Nissan Micra K12: run the engine for a couple of minutes, block the rear wheels, and lift the front of the car, placing it on safety stands. Position a drain pan under the oil sump and let the used oil drain out, which you will then dispose of properly at an authorised centre. The filter on the Micra K12 is right next to the sump, so place a drain pan here as well; unscrew it counter-clockwise with the appropriate filter tool, clean the seat well, and leave the filter in its pan. Lubricate the seal of the new filter with fresh oil and tighten it by hand. Fit a new plug and a new seal to the sump, lower the car, and add new oil, pouring it in gradually while checking the dipstick to ensure the level is between min and max.
Posted on 12 April 2026 by ScegliAuto
Related tutorials
Nissan Micra
(2002-2010 /
K12)
If you want to replace the engine air filter of your Nissan Micra K12 by yourself, you must first carefully read the following guide and then follow …

Nissan Micra
(2002-2010 /
K12)
The video presented here shows us clearly and comprehensively the arrangement of all the fuses within the Nissan Micra K12, specifically the model pr…

Nissan Micra
(2002-2010 /
K12)
With the instructions in this new mini guide, you will be able to replace the key battery of your Nissan Micra K12 (2002-2010) with ease. First, obta…
Other guides you may be interested in
|
How to Remove the Rear Seat of a Hyundai Tucson?
To remove the rear seat of a Hyundai Tucson, follow these steps. Start by moving the front seats to their most forward position to gain space. Next, locate the release lever on the underside of the rear seat, near the floor. Press this lever down while pulling the seat upwards to unlock it from the anchor pins. Once unlocked, tilt the seat upwards and forwards to remove it from its position. Repeat this process for both sides of the rear seat. Be careful of any electrical cables or components that may be connected to the seat during removal. Once the rear seat is removed, the disassembly is complete. by ScegliAuto More videos
|
|
For advertising on this site Write to info@scegliauto.com
ScegliAuto is not responsible for any inaccuracy of the data in the lists. To report any inaccuracy or your business (if you own the business in question), please write to info@scegliauto.com
Number of seconds to generate the page: 0.130
(c) ScegliAuto 2026 - info@scegliauto.com - Privacy policy VAT number: IT01247470535 |
