
|
Do it yourself
| |||
| ||||


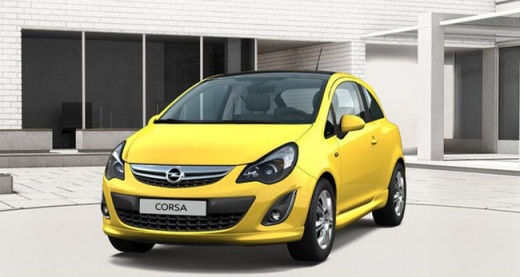
Timing Chain Replacement
Model: Vauxhall Corsa
Corsa D
- Years:
2006, 2007, 2008, 2009, 2010, 2011, 2012, 2013, 2014
Video tutorial
Replacing the timing chain on 1.3 MultiJet engines derived from Fiat is necessary either after a long mileage or because it tends to become noisy even after a short distance. This issue is partly caused by DPF regenerations, which, due to unburnt diesel, alter the oil viscosity, compromising the lubrication of the timing chain. Note that specific tools are required for timing alignment. Start by removing the engine cover, then detach the air filter housing, engine mount, crankshaft pulley, chain protection cover, and oil sump. Apply the timing tools and proceed with the chain replacement: the kit includes a new chain, tensioner, guide rails, toothed pulley, and the cover gasket.
Updated on 11 February 2026 by ScegliAuto
Related tutorials
Vauxhall Corsa
(2006-2014 /
Corsa D)
.. the timing chain on the Opel Corsa 1.0. The timing chain replacement for this engine type is recommended around 155,000 miles, although a visual.. …

Vauxhall Corsa
(2014-2019 /
Corsa E)
The timing chain is crucial for the longevity of the engine, as it ensures the synchronisation between the crankshaft and camshaft. If it fails while…

Vauxhall Corsa
(2000-2006 /
Corsa C)
To replace the timing chain on the Opel Corsa, open the bonnet to access the left side of the engine block. Here, around the respective sprockets, yo…
Other guides you may be interested in
|
How to Remove the Rear Seat of a Hyundai Tucson?
To remove the rear seat of a Hyundai Tucson, follow these steps. Start by moving the front seats to their most forward position to gain space. Next, locate the release lever on the underside of the rear seat, near the floor. Press this lever down while pulling the seat upwards to unlock it from the anchor pins. Once unlocked, tilt the seat upwards and forwards to remove it from its position. Repeat this process for both sides of the rear seat. Be careful of any electrical cables or components that may be connected to the seat during removal. Once the rear seat is removed, the disassembly is complete. by ScegliAuto More videos
|
For advertising on this site Write to info@scegliauto.com
ScegliAuto is not responsible for any inaccuracy of the data in the lists. To report any inaccuracy or your business (if you own the business in question), please write to info@scegliauto.com
Number of seconds to generate the page: 0.042
(c) ScegliAuto 2026 - info@scegliauto.com - Privacy policy VAT number: IT01247470535 |
