
|
Do it yourself
| |||
| ||||


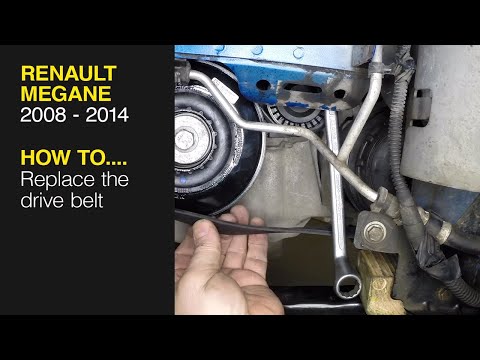
How to replace the accessory belt on the Renault Megane MK III
Model: Renault Megane
Megane 3, Megane III
- Years 2008-2015
In this video, we can see how to easily change the service belt on a Renault Megane III. Let's open the hood and disconnect the negative pole of the battery for safety. We will need to lift the front part of the vehicle and remove the wheel on the passenger side, then place the car on jack stands for added safety. We will then remove the front fender by removing the screws that hold it to the body, and from here we can see the service belt, which moves the alternator that charges the battery, also operates the air conditioning compressor and the water pump. We lift the tensioner pulley and remove the belt: these are two components that are changed at the same time. We can find the kit on auto-doc. It with the code 4014870548568 at a cost of 29.77 euros + 9.95 euros for shipping. We then remove the pulley and replace it with the new one, and then put the new belt in place, respecting the direction of movement and paying attention to the correct positioning (the video will be of great help) and then tighten it well with the help of the tensioner pulley. We can put the fender back in place, the wheel and lower the car to the ground. Reconnect the negative pole of the car. Job done.
Posted on 29 December 2023 by ScegliAuto
Video tutorial
Related tutorials
Renault Megane
(2008-2015 /
Megane 3, Megane III)
The fuse box, on the Renault Megane III, is located in a compartment located between the steering column and the driver's door. It is housed in a can…

Renault Megane
(2008-2015 /
Megane 3, Megane III)
In this video we can see where the fuse boxes of the Renault Megane III are located: for vehicles with left-hand drive, the fuse box is located at th…
Renault Megane
(2008-2015 /
Megane 3, Megane III)
In this video we see how to change the drive belt on the Renault Megane II: from the first drawing we can see the correct arrangement of the drive be…
Other guides you may be interested in
|
How to Replace the Gear Shift Gaiter of the Honda CR-V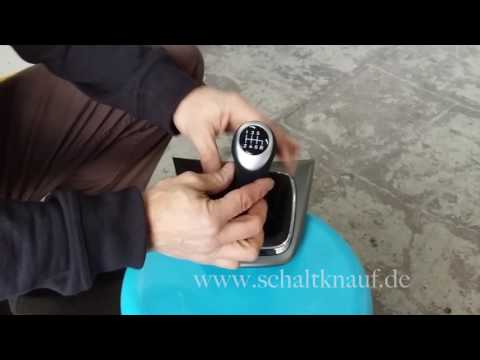
You can purchase an aftermarket gear shift cover complete with a knob, made of leather with coloured stitching. The disassembly is quite straightforward: start by unscrewing the gear shift knob by twisting it. Next, detach the trim at the base of the gear lever by prying along the edges. Then, remove the chrome trim that holds the gaiter in place, peeling off the leather edges from the plastic support. Apply new double-sided adhesive to the plastic tabs to insert and stick the edges of the new gaiter, securing it with the chrome trim. Finally, fit the gaiter complete with the knob onto the gear lever, securing it with the appropriate screws and reattaching the trim to the tunnel support. by ScegliAuto More videos
|

|
For advertising on this site Write to info@scegliauto.com
ScegliAuto is not responsible for any inaccuracy of the data in the lists. To report any inaccuracy or your business (if you own the business in question), please write to info@scegliauto.com
Number of seconds to generate the page: 0.092
(c) ScegliAuto 2026 - info@scegliauto.com - Privacy policy VAT number: IT01247470535 |