
|
Do it yourself
| |||
| ||||


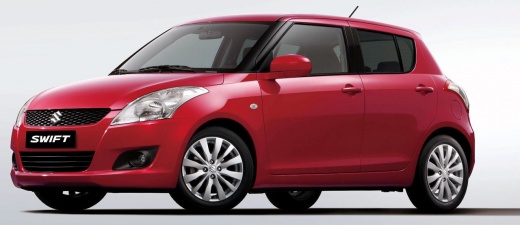
How to Remove the Car Radio from a Suzuki Swift
Model: Suzuki Swift
AZG, MK 5, Rs41
- Years:
2010, 2011, 2012, 2013, 2014, 2015, 2016, 2017
Video tutorial
Before starting, sit in the driver's seat of your Suzuki Swift. Begin by prying and removing the air vents using a thin but sturdy tool. Next, remove the hazard light button and disconnect its electrical connector. This will expose the screws that secure the radio to the dashboard, which you need to unscrew and remove. At this point, you can pull the radio from its housing and disconnect the relevant electrical connectors, completing the removal.
Updated on 12 April 2026 by ScegliAuto
Related tutorials
Suzuki Swift
(2004-2010 /
MK 4, Rs41)
.. Today we will explain how to remove the car radio from a Suzuki Swift in just a few seconds. To replace the car radio, we need.. …

Suzuki Swift
(2010-2017 /
AZG, MK 5, Rs41)
Below we will discover the instructions that will allow us to disassemble and replace the factory radio of the Suzuki Swift. First, we get into the c…

Suzuki Swift
(2010-2017 /
AZG, MK 5, Rs41)
You can replace the radio in a Suzuki Swift by opening the glove compartment located at the top centre of the dashboard. Once this drawer is open, yo…
Other guides you may be interested in
|
How to reset the tyre pressure warning light on the Kia Niro EV?
To reset the tyre pressure warning light on the Kia Niro EV, inflate the tyres until they reach the correct pressure value. This value is indicated on the sticker attached to the driver's door pillar. Once the tyres are inflated, turn on the instrument cluster to check that the warning light has completely disappeared from the display. If it is still present, you may need to drive for a few miles to ensure it disappears completely from the screen. by ScegliAuto More videos
|
|
For advertising on this site Write to info@scegliauto.com
ScegliAuto is not responsible for any inaccuracy of the data in the lists. To report any inaccuracy or your business (if you own the business in question), please write to info@scegliauto.com
Number of seconds to generate the page: 0.036
(c) ScegliAuto 2026 - info@scegliauto.com - Privacy policy VAT number: IT01247470535 |
