
|
Do it yourself
| |||
| ||||


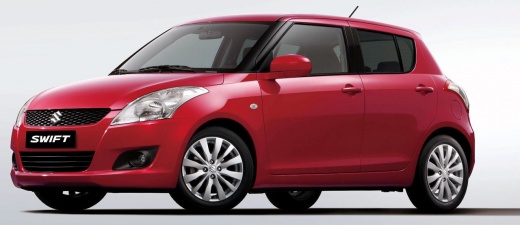
How to Check the Tyre Pressure on a Suzuki Swift
Model: Suzuki Swift
AZG, MK 5, Rs41
- Years:
2010, 2011, 2012, 2013, 2014, 2015, 2016, 2017
Video tutorial
When you see this warning light on, it means you have a tyre that has lost pressure (e.g., due to a puncture or a sudden drop in temperature), so you need to check your tyre pressures as soon as possible. Always remember to check the tyre pressures when they are cold, as the pressure may increase when hot. To verify the correct pressure, refer to the sticker located inside the car on the driver's door. Then, unscrew the valve cap and place it in a safe location; attach the pressure gauge, taking care not to bend the valve. If you notice that one tyre has lower pressure than the others, inflate this tyre until it reaches the ideal pressure value, then replace the valve cap.
Updated on 20 May 2026 by ScegliAuto
Related tutorials
Suzuki Swift
(2010-2017 /
AZG, MK 5, Rs41)
When the TPMS light activates on a Suzuki vehicle, it means you need to check the tyre pressure. The correct tyre pressure varies depending on the mo…

Suzuki Swift
(2017-2024 /
MK 6, A2L)
Before driving our Suzuki Swift, it is important to know and adjust the tire pressure according to the manufacturer's specifications. The pressure of…

Suzuki Swift
(2024-2026 /
MK 4)
Today, we will discover the instructions that allow us to check the tyre pressures on the Suzuki Swift. First, get into the vehicle and turn on the i…
Other guides you may be interested in |
Frequently Asked QuestionsHow to Remove the Rear Seat of a Hyundai Tucson?
To remove the rear seat of a Hyundai Tucson, follow these steps. Start by moving the front seats to their most forward position to gain space. Next, locate the release lever on the underside of the rear seat, near the floor. Press this lever down while pulling the seat upwards to unlock it from the anchor pins. Once unlocked, tilt the seat upwards and forwards to remove it from its position. Repeat this process for both sides of the rear seat. Be careful of any electrical cables or components that may be connected to the seat during removal. Once the rear seat is removed, the disassembly is complete. by ScegliAuto More videos
|
|
For advertising on this site Write to info@scegliauto.com
ScegliAuto is not responsible for any inaccuracy of the data in the lists. To report any inaccuracy or your business (if you own the business in question), please write to info@scegliauto.com
Number of seconds to generate the page: 0.012
(c) ScegliAuto 2026 - info@scegliauto.com - Privacy policy VAT number: IT01247470535 |
