
|
Do it yourself
| |||
| ||||


How to disassemble a shock absorber without a spring compressor
Model: (Various brands) Various
To disassemble a shock absorber of a car, a specific tool is needed, called a "spring compressor", which is used to compress the spring of the shock absorber, allowing the assembly to be disassembled without the risk that the spring, once released, will fly off, causing serious damage or injuries to whoever is handling it. There are various types of spring compressors, from the simplest manual ones, which can easily be found on e-commerce sites like the code 256024079908 on eBay for 45.51 euros with free delivery, to professional hydraulic models. Then there is the very empirical system that is illustrated in the video: a concrete formwork and two rows of 40x40 outdoor tiles, of equal height. Leave a centimeter of space from the lower side and unscrew with a drill extension.
Posted on 18 April 2025 by ScegliAuto
Video tutorial
Related tutorials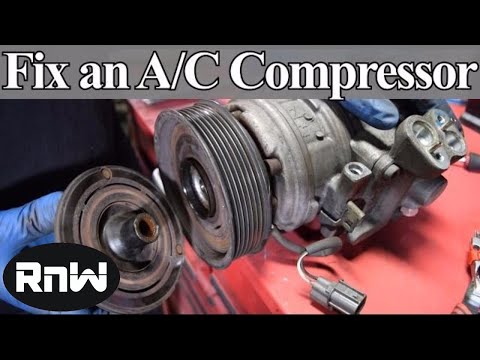
(Various brands) Various
In order to remove the air conditioning compressor pulley, you must first completely disassemble the compressor, so that it is removed from inside it…

(Various brands) Various
If the question is whether it makes sense to fit lowering springs to stock shock absorbers, the answer is definitely: yes. First of all, the manufact…
(Various brands) Various
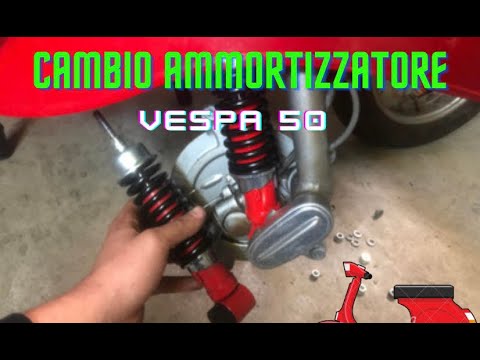
In this video tutorial we can see how it is possible to change the front shock absorber on a Vespa 50. The first thing to do is to buy a new shock ab…
Other guides you may be interested in |
Installation of Upgraded Intercooler Radiator with Pipes
Lift the vehicle on suitable axle stands, remove the front wheels, and then the front bumper and grille. Proceed to remove the front headlights; drain the coolant, remove the intercooler radiator and the hoses connecting it to the intake system. Position the new intercooler radiator in the grille, temporarily securing it with cable ties, and mark with a marker the part of the metal that needs to be removed to allow the new hoses to pass through. Cut the marked portion of metal and apply a gasket to the edge. Remove the inner cover of the bumper and position it near the radiator to identify any interfering parts to eliminate: again, apply a gasket to the edge of the cut. Create brackets for securing the new radiator and proceed with the installation of the connecting pipes from the radiator to the intake, shaping and connecting them appropriately. Finally, reassemble the bumper, headlights, and grille. by ScegliAuto More videos
|
|
For advertising on this site Write to info@scegliauto.com
ScegliAuto is not responsible for any inaccuracy of the data in the lists. To report any inaccuracy or your business (if you own the business in question), please write to info@scegliauto.com
Number of seconds to generate the page: 0.075
(c) ScegliAuto 2026 - info@scegliauto.com - Privacy policy VAT number: IT01247470535 |