
|
Do it yourself
| |||
| ||||


How to Properly Install a Reversing Camera
Model: (Various brands) Various
For the installation of the camera, you will need a digital multimeter, cable ties, insulating tape, and scissors. A good reversing camera can be found on Amazon, including the complete mounting kit, for around £70/80. The red connector goes at the back of the vehicle, and the pink wire connects to the positive reverse light. It is best to choose the location for the camera first, then run the wires; you can start from the stereo to the camera, or vice versa, it makes no difference. Start from underneath and do not fix anything yet, as you need to adjust the length of the wires, which you will retrieve from under the vehicle using the grommets. Connect the pink wire to the reverse light wire and the black wire to the vehicle chassis. Tape the terminals to prevent them from coming loose. Tape the connectors on the reversing camera wire (from the inside), connecting the yellow cable to the camera in, then connect the blue cable to the antenna. Remember that insulating tape tends to come unstuck over the years, especially in hot weather. The other pink wire, which is the camera's power, connects to the other pink wire. The result is excellent.
Updated on 6 August 2026 by ScegliAuto
Video tutorial
Related tutorials
(Various brands) Various
Cars that are a few years old certainly do not have the latest technologies, so even options related to the car radio screen, entertainment, rear cam…
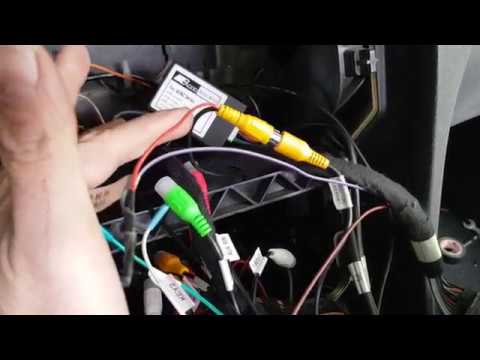
(Various brands) Various
Today, we will install a number plate reverse camera, which can be fitted to any vehicle. First, go to the back of the car and remove the number plat…

(Various brands) Various
In this video, you will see how to install a reversing camera on a vehicle equipped with an original screen. The procedure is the same for any type o…
Other guides you may be interested in
|
Frequently Asked QuestionsHow to Open a Stuck Boot on the Peugeot 407?
On the Peugeot 407, the boot may become stuck, possibly due to a problem with the control button or the lock actuator. In such cases, you can perform an emergency opening by following the simple procedure shown in this tutorial. First, open the rear doors, then lower the seat back by operating the release lever. Next, go inside the boot, locate the lock, and manually operate it using a flathead screwdriver. The boot will then be free to open. by ScegliAuto More videos
|
|
For advertising on this site Write to info@scegliauto.com
ScegliAuto is not responsible for any inaccuracy of the data in the lists. To report any inaccuracy or your business (if you own the business in question), please write to info@scegliauto.com
Number of seconds to generate the page: 0.771
(c) ScegliAuto 2026 - info@scegliauto.com - Privacy policy VAT number: IT01247470535 |
