Volkswagen Jetta - Shocks
Shocks Volkswagen Jetta (1998-2005 / a 4, mk 4)
Shocks Volkswagen Jetta (1991-1998 / mk 3, a 3)
Accelerator (1)
Cigarette lighter (1)
Airbag (2)
Alternator (4)
Speaker (5)
Shocks (3)
Antenna (1)
Air conditioning (10)
Car stereo (12)
Battery (5)
Air vents (1)
Control arm (2)
Transmission (2)
Spark plugs (2)
Glow plugs (1)
Body (7)
Glove compartment (1)
Control unit (2)
Key (33)
Timing belt (10)
V-belt (2)
Air conditioner (4)
Onboard computer (5)
Checks and maintenance (40)
Oil pan (1)
Dashboard (4)
Shifter boot (2)
CV boot (1)
Bearing (5)
Brake rotors (2)
Headlight (13)
Tail light (8)
Fog lights (2)
Diesel particulate filter (1)
Air filter (11)
Cabin air filter (8)
Diesel fuel filter (7)
Oil filter (3)
Parking brake (2)
Clutch (2)
Grille (3)
Window switch (3)
Accessory kit (6)
Light bulb (1)
Side marker bulb (1)
Headlight bulb (20)
Tail light bulb (7)
Interior dome light bulb (3)
Antifreeze coolant (4)
Instrument panel light (1)
License plate light (4)
(1)
Handle (13)
Engine (6)
Power window motor (2)
Starter motor (8)
Transmission fluid (1)
Engine oil (5)
Power steering fluid (1)
Clock (25)
Door trim panel (25)
Windshield (1)
Front bumper (9)
Rear bumper (2)
Brake pads (5)
Shift knob (2)
Pump (7)
Fuel pump (5)
Car door (4)
Push button (6)
Power window switch (2)
Instrument cluster (2)
Radiator (5)
Heater core (12)
Wheel (3)
Fuse box (134)
Seat (19)
Axle shaft (1)
Crankshaft position sensor (1)
Door lock (10)
Oxygen sensor (1)
Suspension system (1)
Side mirror (11)
Rearview mirror (4)
Warning light – error code (16)
(48)
Tire pressure warning light (10)
Service warning light (117)
Fuel cap (18)
Windshield wipers (5)
Thermostat (2)
Cylinder head (1)
Drivetrain (4)
Center console tunnel (1)
Turbocharger (1)
Windshield washer nozzle (1)
EGR valve (1)
Blower motor (4)
Side window (2)
Steering wheel (2)
|
How to Set the Clock on the Opel Zafira
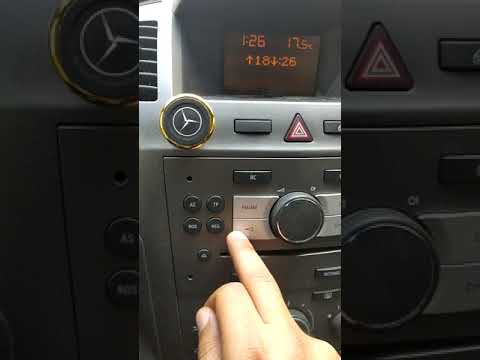
Setting the clock to the current Italian time on an Opel Zafira model B is a very simple operation, also made easier by our short instructional video. The first step is to turn on the instrument panel and then press the SETTING button located on the central dashboard. Once inside the menu, use the buttons to navigate to the clock setting. Adjust the hours and minutes and restart the instrument panel. If the clock does not update, it may be necessary to diagnose the radio or the vehicle's control unit.
Watch the video!
by ScegliAuto
More videos
|