
|
Do it yourself
| |||
| ||||


Audi A1 - Tail light bulbTail Light Bulb Audi A1 (2010-2018 / 8 x, mk 1) Audi A1 (2010-2018 / 8X, MK 1)
Replacing the Rear Light Bulbs on an Audi A1 Today, you will discover the main steps to remove and replace the rear light bulbs on an Audi A1. First, open the rear hatch of the boot and start by removing …Read all… Posted on 1 August 2026 by ScegliAuto  Audi A1 (2010-2018 / 8X, MK 1)
How to replace the rear headlight bulb of the Audi A1 Replacing the rear headlight bulb of the Audi A1 independently is a simple and quick operation to perform. To carry out the replacement, we need to purchase an …Read all… Posted on 22 June 2025 by ScegliAuto  Audi A1 (2010-2018 / 8X, MK 1)
How to replace the rear headlight bulbs of the Audi A1 Following these brief and simple instructions, we will see how to disassemble and replace the bulbs of the rear headlight of the Audi A1. First, we open the …Read all… Posted on 17 January 2025 by ScegliAuto 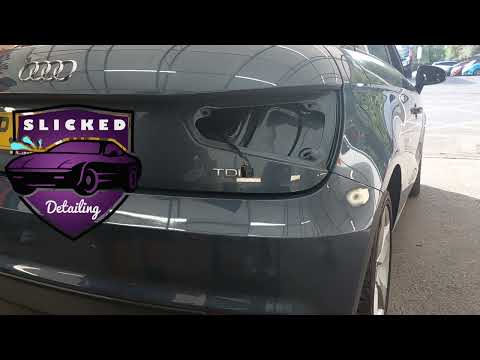 Audi A1 (2010-2018 / 8X, MK 1)
How to Replace the Rear Headlamp Bulb on the Audi A1 This brief video tutorial explains how to independently replace the rear headlamp on the Audi A1. First, remove the three protective caps. Under the caps, you …Read all… Posted on 20 July 2026 by ScegliAuto Airbag (6) Antenna (1) Car stereo (3) Battery (2) Grille (1) Body (3) Control unit (1) Key (17) Timing belt (2) Air conditioner (1) Onboard computer (6) Checks and maintenance (13) Dashboard (1) Headlight (9) Tail light (1) Fog lights (1) Air filter (1) Cabin air filter (9) Diesel fuel filter (1) Oil filter (1) Parking brake (1) Window switch (1) Accessory kit (1) Light bulb (1) Headlight bulb (11) Tail light bulb (4) Interior dome light bulb (1) Handle (2) Exhaust muffler (1) Engine oil (1) Clock (11) Door trim panel (4) Front bumper (2) Brake pads (1) Instrument cluster (1) Heater core (1) Wheel (1) Fuse box (36) Seat (1) Brake system (1) Side mirror (2) Warning light – error code (11) (16) Tire pressure warning light (7) Service warning light (47) Fuel cap (6) |
How to Replace the Heating Radiator in a Volkswagen Golf?
To remove the heating radiator in a Volkswagen Golf, you need to completely dismantle the lower part of the dashboard next to the pedal area: once this panel is removed, you can locate the heating radiator at the bottom of the dashboard. By loosening its fastening screws and disconnecting the fluid passage pipes, you can remove the old radiator and insert the new one. The new radiator must be properly secured and connected, ensuring everything is functioning correctly. by ScegliAuto More videos
|
|
For advertising on this site Write to info@scegliauto.com
ScegliAuto is not responsible for any inaccuracy of the data in the lists. To report any inaccuracy or your business (if you own the business in question), please write to info@scegliauto.com
Number of seconds to generate the page: 0.012
(c) ScegliAuto 2026 - info@scegliauto.com - Privacy policy VAT number: IT01247470535 |
