
|
Do it yourself
| |||
| ||||


Fiat Bravo - Video tutorial
Model: Fiat Bravo
Bravo 2
- Years 2007-2014 As we can see in this video tutorial, to remove the headlight of a second generation Fiat Bravo, produced from 2007 to 2014, we must first of all remove part of the front bumper by unscrewing a few screws as shown in the video, one on the wheel arch and three above the radiator grille. Once this is done, with a 10mm socket wrench, let's unscrew the three screws that hold the headlight in position, two positioned above the headlight and one on the side under the bumper, so now we can detach the bulb wiring from the back of the headlight and finally we can remove the headlight.
Posted on 17 May 2023 by ScegliAuto
Other guides that may interest you
|
Frequently Asked QuestionsHow to reset the tire pressure warning light on Dacia Sandero?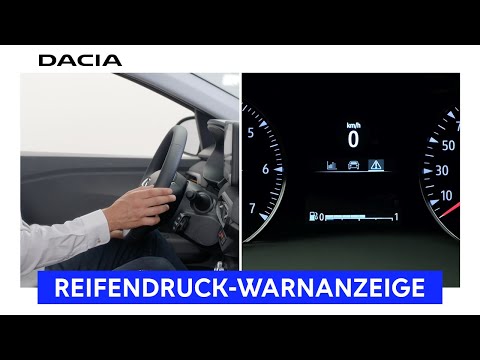
Let's see below how it is possible to reset the low tire pressure signal on the car: first of all it is necessary to check the correct tire pressure by comparing it with the pressures reported in the use and maintenance manual. After that, turn on the ignition and locate the command on the right side of the steering wheel at the top that allows you to access the on-board computer menu, then select the car symbol, after which select the "up arrow" command up to that the indication "tire pressure" appears on the display. At that point, press the "Ok" control on the steering wheel and keep it pressed to reset the signal. by ScegliAuto More videos
|
|
For advertising on this site Write to info@scegliauto.com
ScegliAuto is not responsible for any inaccuracy of the data in the lists. To report any inaccuracy or your business (if you own the business in question), please write to info@scegliauto.com
Number of seconds to generate the page: 0.056
(c) ScegliAuto 2024 - info@scegliauto.com - Privacy Policy VAT number: IT01247470535 |