
|
Do it yourself
| |||
| ||||


What to Do if the AdBlue Start Failure Message Appears on the Ford Transit Dashboard
Model: Ford Transit
MK 8
- Years 2014-2024
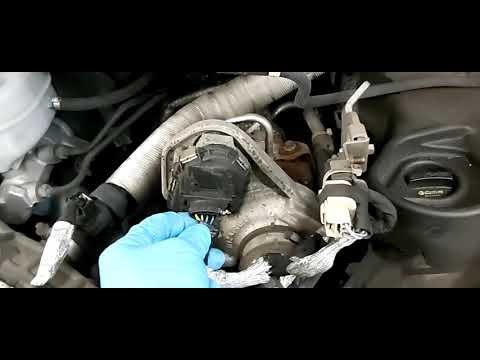
On this 2016 Ford Transit, the AdBlue fault light appears with an engine stop warning at 49 miles, whereas the usual warning starts at 621 miles. An error reading is performed, revealing that the NOx sensor is not communicating. The sensor is located on the exhaust, behind the engine, where there is a cable leading to its control unit. Upon opening the connector, it was found to be oxidised inside, which is the cause of the error. The sensor was difficult to remove due to rust. It is replaced with a new one (available on AliExpress with code 1005011607126727 for £102.99, with free delivery), connected, and the error cleared. However, the vehicle must undergo a self-diagnosis cycle so that the system can recognise the sensor is functioning and the light can turn off.
Posted on 27 February 2026 by ScegliAuto
Video tutorial
Related tutorials
Ford Transit
(2014-2024 /
MK 8)
In this video, we first clarify the purpose of the AdBlue control unit on the Ford Transit, which monitors and controls the amount of AdBlue injected…

Ford Transit
(2014-2024 /
MK 8)
In this video tutorial, you will learn how to top up the AdBlue fluid to reduce CO2 emissions on a Ford Transit Van. When the AdBlue warning light ap…
Ford Transit
(2014-2024 /
MK 8)
When the AdBlue light illuminates on the Ford Transit instrument panel, it indicates that the level in the tank is low or there are issues with the s…
Other guides you may be interested in
|
How to Open the Bonnet on the Lancia Y
To open the bonnet on this vehicle, follow these simple instructions: first, open the driver's door and locate the lever positioned just below the dashboard, marked with an image of the vehicle with the bonnet open. Pull this lever towards you until you hear a "click" indicating the bonnet is released. Next, exit the cabin and stand in front of the bonnet to disengage the safety catch and complete the opening. To do this, slightly lift the bonnet, locate the yellow lever underneath, and pull it to the left to fully release and open the bonnet. by ScegliAuto More videos
|
|
For advertising on this site Write to info@scegliauto.com
ScegliAuto is not responsible for any inaccuracy of the data in the lists. To report any inaccuracy or your business (if you own the business in question), please write to info@scegliauto.com
Number of seconds to generate the page: 0.844
(c) ScegliAuto 2026 - info@scegliauto.com - Privacy policy VAT number: IT01247470535 |
