
|
Do it yourself
| |||
| ||||



How to remove and test the ignition coil on a Hyundai i30.
Model: Hyundai I30
GD, MK 2
- Years:
2011, 2012, 2013, 2014, 2015, 2016
Video tutorial
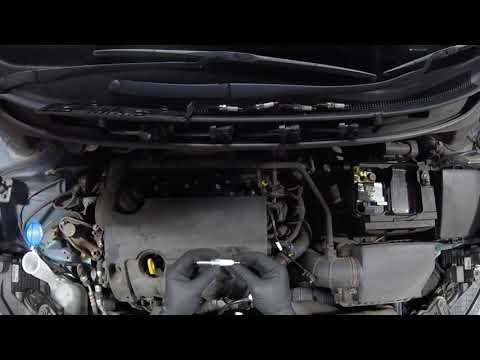
Let's see how to remove and test the ignition coil on a Hyundai I30: first, let's locate the coil, which is positioned directly above the spark plug; disconnect the electrical connector and unscrew the fastening screw. Remove the coil and check the gasket at the bottom: if it is damaged, replace it. The primary test is performed with the multimeter set to Ohms, range 0/200. Connect the probes to the two small pins of the electrical connector of the coil. The expected value is 0.3/1.0 Ohms; if it reads infinite, the coil is open and faulty: the same applies if it reads 0, indicating a short circuit. For the secondary test, switch the multimeter to 0/20 kOhms. Insert one probe into the spark plug socket and the other into one of the two smaller pins of the connector. The expected value is 6.0/12.0 kOhms; if it is too high or infinite, the winding is broken; if it is too low, there is an internal short circuit. In any case, the coil needs to be replaced.
Posted on 6 December 2025 by ScegliAuto
Related tutorials
Hyundai I30
(2007-2012 /
MK 1, FD)
If your Hyundai i30 is running on three cylinders and the scanner shows codes P0300 and P0301, the problem is often one or more ignition coils. First…

Hyundai I30
(2007-2012 /
MK 1, FD)
Let’s see how to change the spark plugs on a Hyundai I30 MK1 petrol. Open the bonnet and remove the plastic cover that protects access to the spark p…
Hyundai I30
(2007-2012 /
MK 1, FD)
Here’s how to remove the spark plugs from a petrol Hyundai i30. Lift the bonnet and locate the engine cylinder head. Remove the cover from above the …
Other guides you may be interested in
|
How to Remove the Rear Seat of a Hyundai Tucson?
To remove the rear seat of a Hyundai Tucson, follow these steps. Start by moving the front seats to their most forward position to gain space. Next, locate the release lever on the underside of the rear seat, near the floor. Press this lever down while pulling the seat upwards to unlock it from the anchor pins. Once unlocked, tilt the seat upwards and forwards to remove it from its position. Repeat this process for both sides of the rear seat. Be careful of any electrical cables or components that may be connected to the seat during removal. Once the rear seat is removed, the disassembly is complete. by ScegliAuto More videos
|
|
For advertising on this site Write to info@scegliauto.com
ScegliAuto is not responsible for any inaccuracy of the data in the lists. To report any inaccuracy or your business (if you own the business in question), please write to info@scegliauto.com
Number of seconds to generate the page: 0.012
(c) ScegliAuto 2026 - info@scegliauto.com - Privacy policy VAT number: IT01247470535 |
