
|
Do it yourself
| |||
| ||||


Mercedes Classe E - Video tutorial
Model: Mercedes Classe E
W212
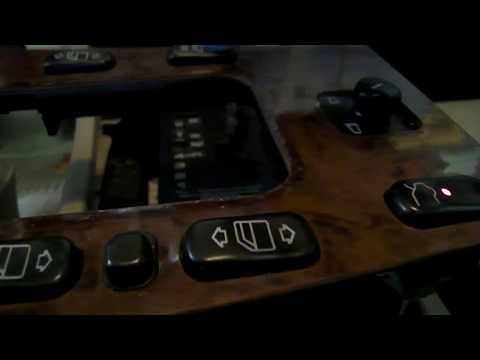
- Years 2009-2016 Let's see in this video how to disassemble and remove the dashboard of the central tunnel of a Mercedes E-Class. We bring the gear knob vertically, then, with the metal keys we remove the lower buttons of the central dashboard. Immediately afterwards, with a cordless screwdriver or screwdriver, we remove the fastening screws located under the car radio and in the lower glove compartment. We are going to remove the rear ventilation vents, once we have removed the grids, we disconnect all the power supply terminals. We unscrew the last locking pins placed in the rear part of the central tunnel. Finally we remove the same from the cockpit. - Socket wrench with sockets - Screwdriver with inserts - Cordless screwdriver - Plastic levers.
Posted on 6 October 2023 by ScegliAuto
This video is currently unavailable
 How to replace the central tunnel push button panel of a Mercedes E-Class
Mercedes Classe E (1995-2002 / W210) .. to sit on the driver's seat of our Mercedes E-Class. Let's start by going to disengage and remove the gear lever frame. After that, we will have to.. 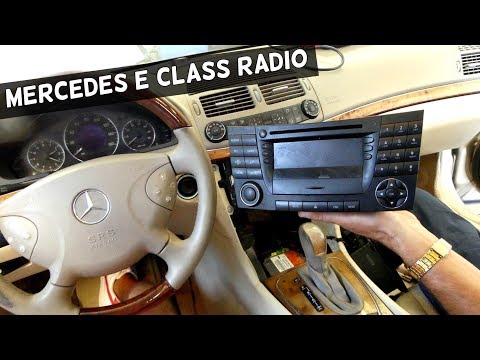 Remove car stereo on Mercedes E-Class
Mercedes Classe E (2002-2009 / W211) .. We replace the car radio of the Mercedes E-Class if we want to replace it or if it is damaged. Remove the covering above the central plastic tunnel.. 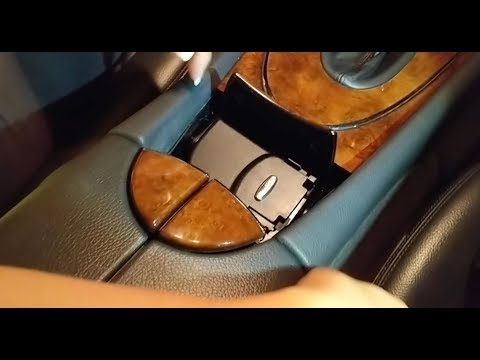 Removing the cup holder on Mercedes E
Mercedes Classe E (2002-2009 / W211) .. to remove the glass holder on the Mercedes E-class? Let's see how the blocked piece (if damaged) above the central tunnel is removed. We open the.. Other guides that may interest you
|
How do I replace the Land Rover Evoque auxiliary battery?
In order to replace the auxiliary battery of the Land Rover Evoque, it is necessary to go inside the passenger compartment and remove the panel which is positioned immediately under the glovebox. Once the screws that secure this panel have been loosened, it will be possible to access the components located in its rear part, including the auxiliary battery. The latter must be disconnected from its cables and the fixing screws must be loosened. The battery can then be replaced with a new one and the panel can be fixed again with its screws. by ScegliAuto More videos
|
|
For advertising on this site Write to info@scegliauto.com
ScegliAuto is not responsible for any inaccuracy of the data in the lists. To report any inaccuracy or your business (if you own the business in question), please write to info@scegliauto.com
Number of seconds to generate the page: 0.067
(c) ScegliAuto 2024 - info@scegliauto.com - Privacy Policy VAT number: IT01247470535 |