
|
Do it yourself
| |||
| ||||


Replacing Front Brake Pads
Model: Mini Mini
R52, R50, R53
- Years 2001-2007
After lifting the vehicle on a lift or jack, remove the wheel on which you wish to work.
Using a medium-sized flat screwdriver, release the retaining spring attached to the brake caliper. Locate and remove the plastic protective caps from the caliper mounting pins, and with a 7mm Allen key, loosen the pins. Using the screwdriver, lever between the disc and the pads to retract the piston and create enough clearance to easily remove the caliper. Then remove the old pads, and with the aid of a clamp, fully retract the piston to create the necessary space for the new pads. At this point, insert the new pads (the one with the metal tabs inside the piston and the other in the designated slot of the caliper support) and reposition the caliper. Tighten the caliper mounting pins and reapply the protective caps. Finally, reattach the retaining spring to the caliper and remount the wheel. Before driving, it is advisable to pump the brake pedal until it offers the correct resistance and to pay attention during the first braking.
Updated on 3 February 2026 by ScegliAuto
Video tutorial
Related tutorials
Mini
(2001-2007 /
R52, R50, R53)
Let's see how to proceed to replace the front brake pads of the Mini. We open the hood, unscrew the cover of the brake fluid reservoir, remove the co…

Mini
(2007-2014 /
R56, R57, R55)
Lift your vehicle and place it on axle stands, remove the wheel in question, and proceed to unscrew the two bolts located at the back of the brake to…

Mini
(2007-2014 /
R56, R57, R55)
Lift the vehicle and support it on an appropriate car stand; remove the front wheel and then the fastening pins of the brake caliper bracket. Extract…
Other guides you may be interested in
|
How to Replace the Rear Indicator Bulb on an Audi A3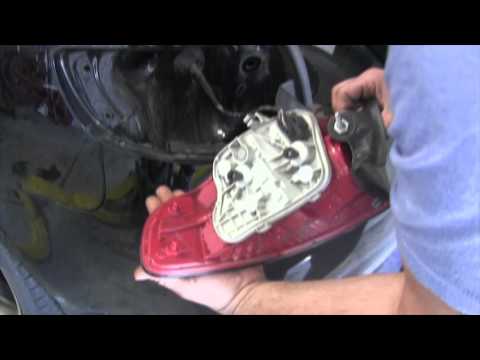
Position the car on a ramp or flat surface and immobilise it. Now, open the boot lid and, inside, corresponding to the rear light where you want to replace the indicator bulb, remove the small plastic cover using a screwdriver. Inside the hole, you will find a bolt (to be removed with a flat screwdriver); once this is undone, you can remove the entire rear light assembly. After this, proceed to remove the part inside the light assembly by unscrewing the 2 small bolts, as shown in the images. In the part you just removed, all the bulbs of the light are mounted. To replace them, simply remove them from their sockets and fit the new ones. To reassemble the entire unit, repeat all the steps shown in the images in reverse order. by ScegliAuto More videos
|
|
For advertising on this site Write to info@scegliauto.com
ScegliAuto is not responsible for any inaccuracy of the data in the lists. To report any inaccuracy or your business (if you own the business in question), please write to info@scegliauto.com
Number of seconds to generate the page: 0.113
(c) ScegliAuto 2026 - info@scegliauto.com - Privacy policy VAT number: IT01247470535 |