
|
Do it yourself
| |||
| ||||


How to Replace the Fog Light Bulbs on an Opel Mokka
Model: Vauxhall Mokka
Mokka A
- Years 2012-2019
To replace the fog light bulbs, you need access to the lower section of the wheel arch located beneath the fog light. To facilitate the operation, it is advisable to lift the car on a ramp or on axle stands. However, as the car is quite high, with a bit of skill, you can perform the operation with the vehicle on the ground. First, unscrew the screw that connects the plastic wheel arch to the bumper, located directly in front of the fog light. After removing the screw, you can open the plastic section of the wheel arch, which is secured to the bumper and the underbody protection with plastic clips. Once opened, it will provide access to the back of the fog light where the bulb holder will be visible. At this point, disconnect the connector supplying power to the fog light, and you can extract the bulb holder by turning it half a turn. Now the bulb holder and bulb will be removed and can be replaced with a new unit. Finally, reconnect the power connector and close the wheel arch. It is advisable to check the operation of the bulb before closing everything up to avoid unpleasant surprises once the job is finished.
Updated on 9 March 2026 by ScegliAuto
Video tutorial
Related tutorials
Vauxhall Mokka
(2012-2019 /
Mokka A)
In this tutorial we can see how to replace the fog light bulbs in the Opel Mokka, an extremely simple and quick operation. First of all, make sure th…

Vauxhall Mokka
(2012-2019 /
Mokka A)
When the "MIL" (Malfunction Indicator Lamp) light activates on the dashboard of your Opel Mokka, it indicates a general malfunction with the emission…
Vauxhall Mokka
(2012-2019 /
Mokka A)
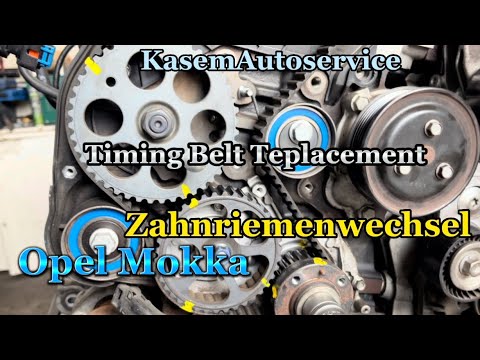
To replace the timing belt on an Opel Mokka, it is advisable to remove the engine block from its housing. Once the engine has been removed, you can d…
Other guides you may be interested in
|
How to Open the Bonnet of a Renault Megane if the Lever is Broken?
If the lever that unlocks the bonnet of the Renault Megane is broken or not functioning, there is an emergency procedure to unlock the mechanism: remove the right front grille located at the top of the bumper. Once the grille is removed, you can locate the actuator mechanism: by pulling the spring in this position, you can unlock the actuator, allowing you to lift the bonnet and access the components located inside the engine compartment. You can then close the bonnet simply by lowering it. by ScegliAuto More videos
|

For advertising on this site Write to info@scegliauto.com
ScegliAuto is not responsible for any inaccuracy of the data in the lists. To report any inaccuracy or your business (if you own the business in question), please write to info@scegliauto.com
Number of seconds to generate the page: 1.030
(c) ScegliAuto 2026 - info@scegliauto.com - Privacy policy VAT number: IT01247470535 |
