
|
Do it yourself
| |||
| ||||


Installing Spacers for Lifted Suspension
Model: RAM 1500
MK 3, DR, DH, D1, DC, DM
- Years 2002-2008
The purpose of this operation is to install rubber spacers between the frame and the body of the vehicle to raise the latter.
First, remove the rear bumper, grille, and front bumper. The body of the SUV in question is divided into two parts: the front cab (supported by the frame through mounts) and the rear bed (attached directly to the frame). The first step is to lift the cab with a jack (if necessary, place wooden blocks between the jack and the cab) to distance it from the frame and insert the rubber spacers at the mounts. Next, lift the rear bed with the jack and insert the rubber spacers between the frame and the bed itself (after removing the mounting pins); it is also suggested to install spacers (possibly made from a metal profile of appropriate section) between the frame and the reinforcement cross members of the bed by welding them to the frame. Having raised the cab, it will be necessary to cut a small portion of the frame's long members and the internal ribs of the front bumper to avoid any interference. Finally, reassemble the grille and bumpers.
Updated on 3 February 2026 by ScegliAuto
Video tutorial
Related tutorials
RAM 1500
(1994-2001 /
BR, BE, MK 2)
To replace the front shock absorbers, first lift the vehicle and remove the wheel. Then, unbolt the screw at the base of the suspension that secures …
RAM 1500
(2002-2009 /
D1, DC, DH, DR, DM, MK 3)
The front suspension of the vehicle consists of two control arms, one lower and one upper, connected to the hub support via ball joints. Due to the c…

RAM 1500
(2019-2026 /
MK 5, DT)
In this video tutorial we are shown how to locate the fuse boxes present in a latest production RAM 1500 pick-up and the related assignment diagrams.…
Other guides you may be interested in
|
How to Remove the Lambda Sensor on a BMW 7 Series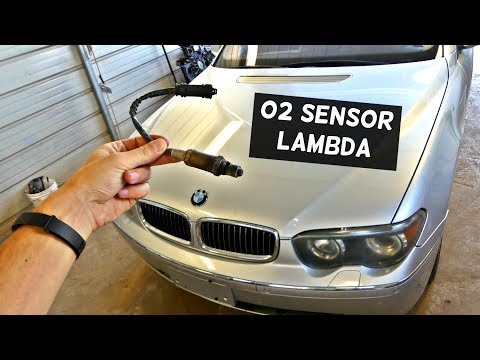
In this video, learn how to replace the lambda sensor on a BMW 7 Series. Lift the car using a column lift or jack, secure it at a comfortable working height, and ensure it is stable. Remove the plastic engine cover panel with a screwdriver, disconnect the power connector from the lambda sensor, and unscrew the sensor using a suitable wrench. Once you have removed the sensor from its housing, compare it with the new part. Install the new sensor with the appropriate wrench and reconnect the power connector. Finally, reinstall the soundproofing engine cover. by ScegliAuto More videos
|
|
For advertising on this site Write to info@scegliauto.com
ScegliAuto is not responsible for any inaccuracy of the data in the lists. To report any inaccuracy or your business (if you own the business in question), please write to info@scegliauto.com
Number of seconds to generate the page: 0.061
(c) ScegliAuto 2026 - info@scegliauto.com - Privacy policy VAT number: IT01247470535 |