
|
Do it yourself
| |||
| ||||


Front Headlight Bulb Replacement
Model: Saab 9 3
MK 2
- Years 2002-2014
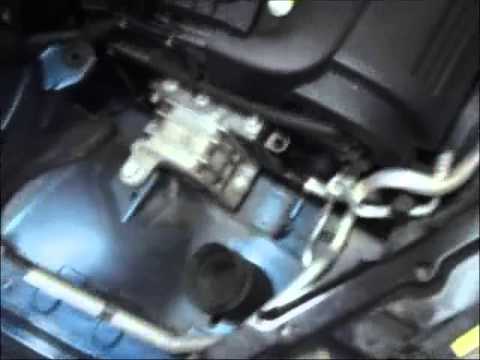
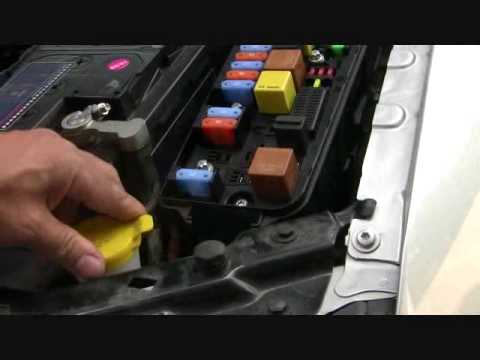
To replace the front headlight bulb, you must remove the headlight itself: open the front bonnet and ensure it is securely supported, remove the plastic cover over the battery compartment, the washer reservoir fill tube, and disconnect the fuse box cover. Disconnect the intake hose from the air filter housing and unscrew the headlight fastening screws to remove it from its housing and place it on a convenient workbench. Remove the protective cap from the bulb holder, disconnect the bulb holder and extract the old bulb, insert a new one and reconnect the bulb holder, replacing the cap (use pliers to extract the position bulb). Proceed in reverse for reassembly.
Updated on 5 February 2026 by ScegliAuto
This video is currently unavailable
Related tutorials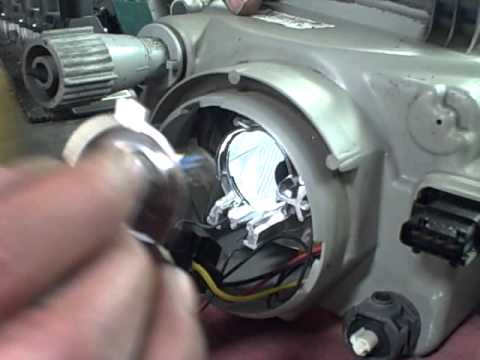
Saab 9 3
(2002-2014 /
MK 2)
In this guide, to describe the operations more clearly, the headlight was completely removed from the vehicle and placed on the workbench. Once the h…
Saab 9 3
(2002-2014 /
MK 2)
To replace the left front headlight bulb, first remove the air filter housing; then remove the rubber cap behind the headlight, disconnect the connec…
Saab 9 3
(2002-2014 /
MK 2)
To easily access the rear of the headlight, first remove the plastic cover of the battery, the windscreen washer reservoir (simply pull it upwards), …
Other guides you may be interested in
|
How to Replace the Spark Plugs on a Kia Cee'd
First, release the bonnet using the appropriate lever to lift it and secure it with the prop rod. Then, remove the upper rear cover of the engine, where the tops of the spark plugs are located. Once the cover is removed, disconnect the connectors from the coils that feed the spark plugs at the bottom of the cylinder where the coils are housed. Using a socket spanner, unscrew the spark plugs and pull them out. If your socket is magnetised, it will help; otherwise, you will need to use long-nosed pliers, and you're done! by ScegliAuto More videos
|
|
For advertising on this site Write to info@scegliauto.com
ScegliAuto is not responsible for any inaccuracy of the data in the lists. To report any inaccuracy or your business (if you own the business in question), please write to info@scegliauto.com
Number of seconds to generate the page: 0.224
(c) ScegliAuto 2026 - info@scegliauto.com - Privacy policy VAT number: IT01247470535 |