
|
Do it yourself
| |||
| ||||


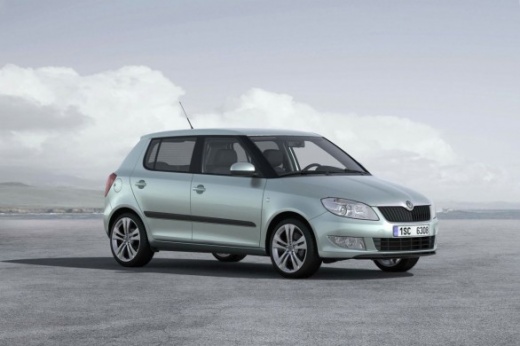
Skoda: how to change the key battery DIY (do it yourself)
Model: Skoda Fabia
5J, Mark2
- Years:
2007, 2008, 2009, 2010, 2011, 2012, 2013, 2014
Video tutorial
On the Skoda key fob, the battery replacement is done on a workbench, with the remote being dry and clean. The blade is released by pressing the opening button, then the shell is separated at the access point shown, using a plastic tool to avoid scratching. The battery compartment is opened, the old cell is removed while checking its orientation, and the new battery of the same type is inserted, ensuring it makes proper contact with the terminals. The cover is then closed, followed by the shell, engaging the guide teeth and pressing along the perimeter until it clicks uniformly. Finally, the remote open/close function is tested; if the remote does not respond, it is advisable to check the polarity, the condition of the contacts, and repeat the assembly.
Posted on 3 June 2026 by ScegliAuto
Related tutorials
Skoda Fabia
(2014-2021 /
Mark3, NJ)
To change the battery of the flip key on the Skoda Fabia, hold the remote in your hand and release the emergency mechanical key from the shell. With …

Skoda Fabia
(2014-2021 /
Mark3, NJ)
To remove the battery from a Skoda Fabia, first ensure that the car is turned off and the handbrake is engaged. Open the front bonnet and locate the …

Skoda Fabia
(1999-2007 /
Mark1, 6Y)
Want to change the key battery? Let's see how to change the key battery of a Skoda Fabia. Take your remote key and use a screwdriver to pry between t…
Other guides you may be interested in
|
How to Remove the Rear Seat of a Hyundai Tucson?
To remove the rear seat of a Hyundai Tucson, follow these steps. Start by moving the front seats to their most forward position to gain space. Next, locate the release lever on the underside of the rear seat, near the floor. Press this lever down while pulling the seat upwards to unlock it from the anchor pins. Once unlocked, tilt the seat upwards and forwards to remove it from its position. Repeat this process for both sides of the rear seat. Be careful of any electrical cables or components that may be connected to the seat during removal. Once the rear seat is removed, the disassembly is complete. by ScegliAuto More videos
|
|
For advertising on this site Write to info@scegliauto.com
ScegliAuto is not responsible for any inaccuracy of the data in the lists. To report any inaccuracy or your business (if you own the business in question), please write to info@scegliauto.com
Number of seconds to generate the page: 0.085
(c) ScegliAuto 2026 - info@scegliauto.com - Privacy policy VAT number: IT01247470535 |
