
|
Do it yourself
| |||
| ||||


Replacing a Faulty Battery
Model: Toyota Prius
MK 1
- Years:
2004, 2005, 2006, 2007, 2008, 2009
Video tutorial
If there are problems starting the vehicle, the fault may lie with the battery that no longer provides the necessary current, so it needs to be replaced. The average lifespan of a battery is about three years. The battery is located in the boot. Open the boot lid and remove the right side cover of the battery compartment. First, loosen the nut on the negative terminal and disconnect it from the battery, then loosen the nut on the positive terminal and remove it from the battery post. Unscrew the nut located on the right side of the battery, removing the retaining plate at the bottom. Pull the battery out of its housing using the designated handles. Install the new battery and secure it properly with the screw and corresponding plate. Clean the battery terminals with sandpaper or a cloth. Position the terminal on the positive post, pushing it down fully and tightening the securing nut, then perform the same operation with the negative terminal. Do not dispose of the used battery in the environment; take it to the appropriate collection centres.
Updated on 4 February 2026 by ScegliAuto
Related tutorials
Toyota Prius
(2004-2009 /
MK 1)
Batteries are located in the boot. Open the boot lid and remove the battery compartment cover. Once the faulty battery is identified, first loosen th…
Toyota Prius
(2004-2009 /
MK 1)
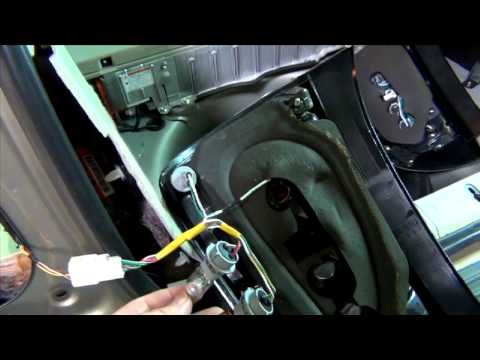
To replace the bulb, you only need a screwdriver and a ratchet. To replace the bulb, you must disassemble the entire lamp assembly. The screws are ac…

Toyota Prius
(2016-2023 /
MK 3, Xw50)
Thanks to the steps outlined in the following guide, you can complete the battery replacement of your Toyota Prius Mk3 remote in just a few seconds. …
Other guides you may be interested in
|
How to Remove the Rear Seat of a Hyundai Tucson?
To remove the rear seat of a Hyundai Tucson, follow these steps. Start by moving the front seats to their most forward position to gain space. Next, locate the release lever on the underside of the rear seat, near the floor. Press this lever down while pulling the seat upwards to unlock it from the anchor pins. Once unlocked, tilt the seat upwards and forwards to remove it from its position. Repeat this process for both sides of the rear seat. Be careful of any electrical cables or components that may be connected to the seat during removal. Once the rear seat is removed, the disassembly is complete. by ScegliAuto More videos
|
|
For advertising on this site Write to info@scegliauto.com
ScegliAuto is not responsible for any inaccuracy of the data in the lists. To report any inaccuracy or your business (if you own the business in question), please write to info@scegliauto.com
Number of seconds to generate the page: 0.036
(c) ScegliAuto 2026 - info@scegliauto.com - Privacy policy VAT number: IT01247470535 |
