
|
Do it yourself
| |||
| ||||


Volkswagen Jetta - Video tutorial
Model: Volkswagen Jetta
MK 5, A5
- Years 2005-2010 In order to install this accessory it is necessary to disassemble the car radio: then unhook the grille located in the center of the dashboard, disassemble the support below and then the air vents (better if you unhook the socket and remove them completely rather than place them on the dashboard risking scratching it). Then unscrew the fixing screws of the frame placed around the air conditioner controls and remove it: at this point it is possible to access the fixing screws of the car radio. Unscrew the screws and remove it from its seat: then proceed with the installation of the kit by inserting the sockets as per the attached diagram, connecting the ground (it is better to fix it under the nut rather than fit it) and checking its operation. Finally, run the cables in order to position the Aux output in the object drawer or along the central tunnel.
Posted on 12 July 2023 by ScegliAuto
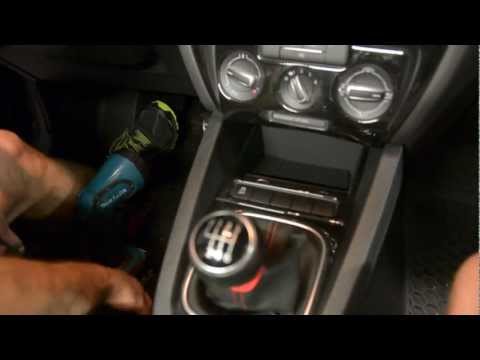 Traction control activation button installation
Volkswagen Jetta (2010-2018 / A6, MK 6) Unfortunately, Volkswagen did not equip the car with a button to activate and deactivate the traction control system (TCS). Fortunately, the vehicle 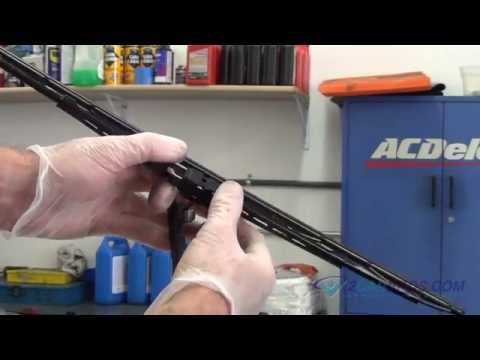 Removing and replacing the wiper blades
Volkswagen Jetta (2005-2010 / MK 5, A5) This video shows us how to remove and replace the wiper blades on our car. If, when operating the wiper blades, our windshield is still dirty or stre 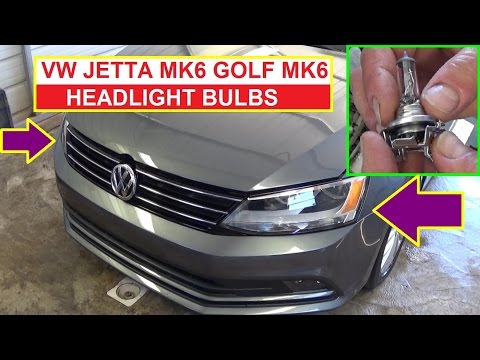 How do you replace the Volkswagen Jetta headlight bulb?
Volkswagen Jetta (2010-2018 / A6, MK 6) Replacing the Volkswagen Jetta headlight bulb is done by opening the hood, so that you have access to the components in the rear part of the correspo Other guides that may interest you
|
How do I replace the Land Rover Evoque auxiliary battery?
In order to replace the auxiliary battery of the Land Rover Evoque, it is necessary to go inside the passenger compartment and remove the panel which is positioned immediately under the glovebox. Once the screws that secure this panel have been loosened, it will be possible to access the components located in its rear part, including the auxiliary battery. The latter must be disconnected from its cables and the fixing screws must be loosened. The battery can then be replaced with a new one and the panel can be fixed again with its screws. by ScegliAuto More videos
|
|
For advertising on this site Write to info@scegliauto.com
ScegliAuto is not responsible for any inaccuracy of the data in the lists. To report any inaccuracy or your business (if you own the business in question), please write to info@scegliauto.com
Number of seconds to generate the page: 0.038
(c) ScegliAuto 2024 - info@scegliauto.com - Privacy Policy VAT number: IT01247470535 |