
|
Do it yourself
| |||
| ||||


How to Remove the Rear Bumper from Volkswagen Tiguan mk1 R-Line
Model: Volkswagen Tiguan
5N, MK 1
- Years 2007-2016
This guide shows how to remove the rear bumper from the Volkswagen Tiguan mk1 R-Line. Open the boot lid to access the four Torx25 screws, two on each side, located under the seal; another two screws are located under the number plate holder. Six additional screws, three on each side, are found in the rear wheel arch and at the bottom of the vehicle. At the bottom of the bumper, there are two Torx30 screws to unscrew for proper removal of the piece. At this point, you can detach the two wheel arch liners, held in place by plastic clips. From inside the boot, on the right side, there is a small compartment with electrical connections that need to be disconnected. Now you can unclip the bumper clips and remove it completely. The operation is now complete.
Updated on 18 April 2026 by ScegliAuto
Video tutorial
Related tutorials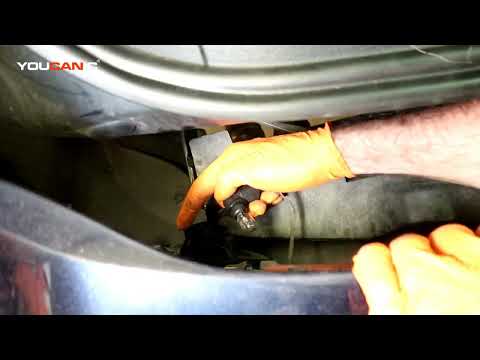
Volkswagen Tiguan
(2007-2016 /
5N, MK 1)
Follow these steps to remove and replace the reverse light bulb and rear bumper on the Volkswagen Tiguan. First, open the boot and start unscrewing t…

Volkswagen Tiguan
(2016-2025 /
BW, MK 2, AD)
Today's instructions will allow us to disassemble and replace the rear bumper of the Volkswagen Tiguan. First, let's open the rear hatch of the trunk…

Volkswagen Tiguan
(2007-2016 /
5N, MK 1)
The guide shows how to disassemble the rear bumper of the Volkswagen Tiguan Mk1. The first step is to remove the Torx T25 screws securing the mud fla…
Other guides you may be interested in
|
How to Replace the External Wing Mirror on a Ford C MAX
In the event of a breakage, it will be necessary to replace the external wing mirror on the 2011 Ford C MAX. This operation is easily performed independently. Start by removing the internal cover of the mirror with a plastic lever. Then, use a socket wrench to remove the securing pins. Once the pins are removed, you can take off the mirror, but not before disconnecting the power connectors. Then proceed to fit the new mirror. First, connect the connectors and then secure the mirror to its housing with the pins. Refit the plastic cover and test the operation of the electric mirror using the controls. by ScegliAuto More videos
|
|
For advertising on this site Write to info@scegliauto.com
ScegliAuto is not responsible for any inaccuracy of the data in the lists. To report any inaccuracy or your business (if you own the business in question), please write to info@scegliauto.com
Number of seconds to generate the page: 0.068
(c) ScegliAuto 2026 - info@scegliauto.com - Privacy policy VAT number: IT01247470535 |
