
|
Do it yourself
| |||
| ||||


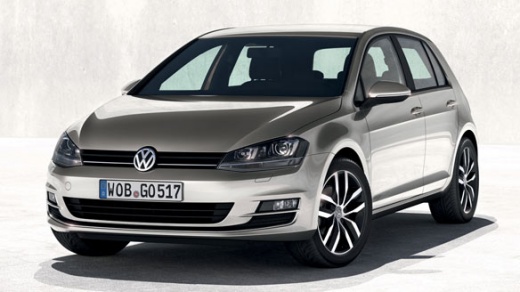
Check and Top Up the Coolant in the Volkswagen Golf 7
Model: Volkswagen Golf
MK 7, Golf 7, Golf VII
- Years:
2012, 2013, 2014, 2015, 2016, 2017, 2018, 2019
Video tutorial
Start the car and turn on the engine; the warning light will appear with a message to check the coolant level. Don't panic; turn off the engine and pull the lever to open the bonnet. Get out of the car and lift the bonnet; locate the expansion tank and check the coolant level inside. The engine must be cold; otherwise, the liquid that has expanded due to heat will give a false reading. Additionally, with a hot engine, the system is under pressure, and opening the cap could cause coolant to escape, risking burns. Therefore, working with a cold engine, if the level is below the 'min' mark, you need to top it up. It is advisable to keep a bottle of ready-to-use coolant in the car for easy addition; generally, the type of coolant is specified in the owner's manual, and for the Golf 7, it should be referred to as 'Antifreeze G13'. If suitable coolant is not available, you can use distilled water for a small top-up, although it lacks the properties of proper coolant and is free of limescale.
Updated on 4 May 2026 by ScegliAuto
Related tutorials
Volkswagen Golf
(2008-2012 /
Golf 6, MK 6, 5K1, Golf VI)
To replace the coolant in the Volkswagen Golf 6, access the underside of the vehicle: there will be screws securing the undertray at the bottom. Once…
Volkswagen Golf
(2012-2019 /
MK 7, Golf 7, Golf VII)
To replace the coolant in a Volkswagen Golf 7, open the bonnet to remove the cap from the coolant reservoir. Once the reservoir is open, lift the car…

Volkswagen Golf
(2012-2019 /
MK 7, Golf 7, Golf VII)
In this guide, follow the steps to top up the fluids on the Volkswagen Golf 1.6 TDI. First, open the bonnet of your car and check the coolant level; …
Other guides you may be interested in
|
How to Remove the Rear Seat of a Hyundai Tucson?
To remove the rear seat of a Hyundai Tucson, follow these steps. Start by moving the front seats to their most forward position to gain space. Next, locate the release lever on the underside of the rear seat, near the floor. Press this lever down while pulling the seat upwards to unlock it from the anchor pins. Once unlocked, tilt the seat upwards and forwards to remove it from its position. Repeat this process for both sides of the rear seat. Be careful of any electrical cables or components that may be connected to the seat during removal. Once the rear seat is removed, the disassembly is complete. by ScegliAuto More videos
|
|
For advertising on this site Write to info@scegliauto.com
ScegliAuto is not responsible for any inaccuracy of the data in the lists. To report any inaccuracy or your business (if you own the business in question), please write to info@scegliauto.com
Number of seconds to generate the page: 0.039
(c) ScegliAuto 2026 - info@scegliauto.com - Privacy policy VAT number: IT01247470535 |
