
|
Do it yourself
| |||
| ||||


How to Renew the Interior of a Volkswagen Golf V
Model: Volkswagen Golf
Golf 5, MK 5, Golf V
- Years:
2003, 2004, 2005, 2006, 2007, 2008
Video tutorial
If the interior of your Golf V is heavily worn, you can easily replace it at a low cost - although using the e-commerce platform mentioned in the video may take some time - or by investing a bit more money, you can obtain the same parts much quicker from the more common platforms in the UK. Start with the window switch panels: they are clipped in, just pull them off, remove the connectors, reinsert them, and they are as good as new. The air conditioning control is also clipped in; just pull it slightly to the right and left, and it will come out. Be careful with the connector: reinsert it, and it’s done. For the gear lever gaiter, remove the clip holding the knob and change the entire unit. The rear window lifter requires removing the entire panel, but it’s not too difficult; there are only four screws (and the usual connectors). Once you have removed the panel, turn it upside down and unscrew the two screws holding the rear window lifter, immediately repositioning the new one. Put the connectors back in place, rest the panel against the door, tighten the screws, and you’re finished.
Updated on 22 May 2026 by ScegliAuto
Related tutorials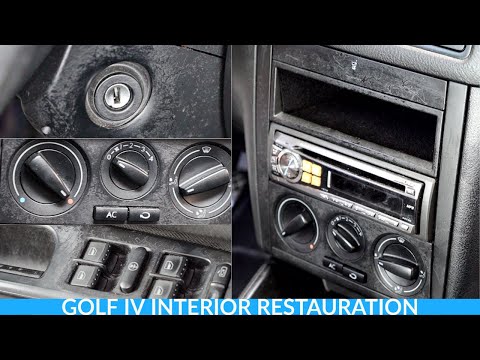
Volkswagen Golf
(1997-2003 /
Golf IV, Golf 4, MK 4)
As seen in the video, the interiors of this Volkswagen Golf MK4 are damaged: upholstery that is no longer attached, worn and tired interiors. Natural…

Volkswagen Golf
(2003-2008 /
Golf 5, MK 5, Golf V)
This guide provides instructions regarding the positioning and diagram of the internal fuse box for the Volkswagen Golf. First, open the driver's sid…

Volkswagen Golf
(2012-2019 /
MK 7, Golf 7, Golf VII)
Today we will discover information about the positioning and diagram of the internal fuses of the Volkswagen Golf. First, we get into the car and sta…
Other guides you may be interested in
|
Frequently Asked QuestionsHow to Remove the Rear Seat of a Hyundai Tucson?
To remove the rear seat of a Hyundai Tucson, follow these steps. Start by moving the front seats to their most forward position to gain space. Next, locate the release lever on the underside of the rear seat, near the floor. Press this lever down while pulling the seat upwards to unlock it from the anchor pins. Once unlocked, tilt the seat upwards and forwards to remove it from its position. Repeat this process for both sides of the rear seat. Be careful of any electrical cables or components that may be connected to the seat during removal. Once the rear seat is removed, the disassembly is complete. by ScegliAuto More videos
|
|
For advertising on this site Write to info@scegliauto.com
ScegliAuto is not responsible for any inaccuracy of the data in the lists. To report any inaccuracy or your business (if you own the business in question), please write to info@scegliauto.com
Number of seconds to generate the page: 0.023
(c) ScegliAuto 2026 - info@scegliauto.com - Privacy policy VAT number: IT01247470535 |
