
|
Do it yourself
| |||
| ||||


Volvo Xc90 - Door trim panelDoor Trim Panel Volvo Xc90 (2015-2026 / mk 2) Volvo Xc90 (2002-2014 / MK 1) How to disassemble the rear door panel in the Volvo XC90? In this tutorial we can see how to disassemble the rear door panel in the Volvo XC90, an extremely simple and quick operation. First of all, we open the door …Read all… Posted on 11 November 2025 by ScegliAuto 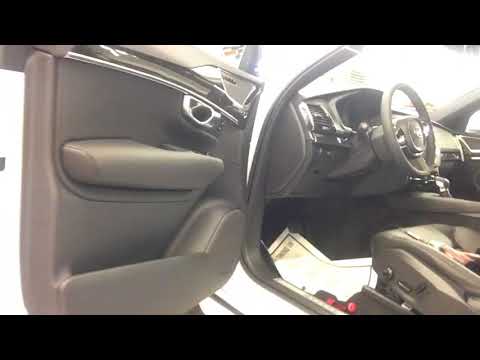 Volvo Xc90 (2015-2026 / MK 2) How to Remove the Front Door Panel of the Volvo XC90 In a few simple steps, you will learn how to remove the front door panel of the Volvo XC90 by following the instructions below. First, open the front door and …Read all… Posted on 17 September 2026 by ScegliAuto  Volvo Xc90 (2002-2014 / MK 1) Removing the Front Door Panel First, detach the plastic triangle located just behind the external rearview mirror; also disconnect the internal handle grip and then remove the screws …Read all… Posted on 9 February 2026 by ScegliAuto  Volvo Xc90 (2002-2014 / MK 1) Instructions for Removing the Rear Door Panel Remove the aluminum cover from the inner handle and unscrew the screws underneath. Release the retaining clips along the edges of the panel using a flat tool; …Read all… Posted on 8 February 2026 by ScegliAuto  Volvo Xc90 (2002-2014 / MK 1) Removing the Front Door Panel First, remove the triangular plastic cover located near the outside rearview mirror; disconnect the cover of the internal handle and remove the screws located …Read all… Posted on 8 February 2026 by ScegliAuto Door Trim Panel Volvo Xc90 (2002-2014 / mk 1)
Volvo Xc90 (2002-2014 / MK 1)How to disassemble the rear door panel in the Volvo XC90? In this tutorial we can see how to disassemble the rear door panel in the Volvo XC90, an extremely simple and quick operation. First of all, we open the door …Read all… Posted on 11 November 2025 by ScegliAuto
Volvo Xc90 (2015-2026 / MK 2)How to Remove the Front Door Panel of the Volvo XC90 In a few simple steps, you will learn how to remove the front door panel of the Volvo XC90 by following the instructions below. First, open the front door and …Read all… Posted on 17 September 2026 by ScegliAuto
Volvo Xc90 (2002-2014 / MK 1)Removing the Front Door Panel First, detach the plastic triangle located just behind the external rearview mirror; also disconnect the internal handle grip and then remove the screws …Read all… Posted on 9 February 2026 by ScegliAuto
Volvo Xc90 (2002-2014 / MK 1)Instructions for Removing the Rear Door Panel Remove the aluminum cover from the inner handle and unscrew the screws underneath. Release the retaining clips along the edges of the panel using a flat tool; …Read all… Posted on 8 February 2026 by ScegliAuto
Volvo Xc90 (2002-2014 / MK 1)Removing the Front Door Panel First, remove the triangular plastic cover located near the outside rearview mirror; disconnect the cover of the internal handle and remove the screws located …Read all… Posted on 8 February 2026 by ScegliAuto Shocks (1) Car stereo (4) Battery (9) Ignition coil (1) Control arm (3) Spark plugs (3) Body (1) Key (15) Trunk lock (1) Timing belt (9) Onboard computer (7) Checks and maintenance (13) Dashboard (1) Shifter boot (1) Bearing (1) Brake rotors (2) Headlight (1) Tail light (2) Fog lights (1) Air filter (3) Cabin air filter (6) Fuel filter (1) Diesel fuel filter (4) Oil filter (1) Parking brake (7) Grille (1) Fuel injectors (1) Window switch (1) Accessory kit (1) Light bulb (2) Side marker bulb (2) Headlight bulb (6) Tail light bulb (3) Antifreeze coolant (1) Handle (6) Engine oil (4) Clock (2) Door trim panel (5) Brake pads (1) Shift knob (1) Car door (1) Instrument cluster (2) Radiator (2) Heater core (1) Fuse box (10) Seat (2) Suspension system (1) Side mirror (2) AdBlue warning light (1) Warning light – error code (6) (1) Tire pressure warning light (21) Service warning light (69) Fuel cap (2) Windshield wipers (4) Tie rods (1) Drivetrain (1) Center console tunnel (1) |
How to reset the Service light on a 2019 Jeep Renegade?
The Service light, depicted as a yellow spanner, illuminates as scheduled to remind the driver that it is time for scheduled maintenance. This means that the set mileage has been reached, or the expected time has passed. The procedure involves turning on the instrument cluster, pressing the accelerator three times, and then turning off the ignition. After this, keep the brake pressed, turn the ignition back on, and then turn it off again. Upon the next ignition, you will notice that the light has been reset. by ScegliAuto More videos
|
|
For advertising on this site Write to info@scegliauto.com
ScegliAuto is not responsible for any inaccuracy of the data in the lists. To report any inaccuracy or your business (if you own the business in question), please write to info@scegliauto.com
Number of seconds to generate the page: 0.008
(c) ScegliAuto 2026 - info@scegliauto.com - Privacy policy VAT number: IT01247470535 |
