
|
Do it yourself
| |||
| ||||


How to Replace the Load Light on a Fiat Ducato
Model: Fiat Ducato
X290
- Years 2014-2024
The YouTuber demonstrating the video initially bought the wrong bulbs, so the safest way to purchase the correct ones is to go to a physical store with the old bulb to ensure you buy the right one. Push upwards on the plastic cover and then pull it towards you: you will see the wires connected at the back and a clip connector, which you will push and simultaneously pull to separate the light unit from the wiring. Lift one side of the transparent part and remove it completely to see the contacts where the bulb goes: you will need to apply some force. Close the cover, reconnect the electrical connector to the light unit, and push to secure it.
Posted on 17 February 2026 by ScegliAuto
Video tutorial
Related tutorials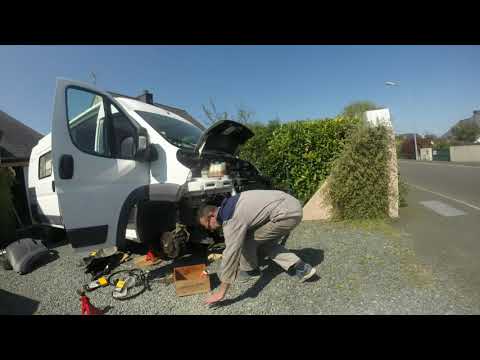
Fiat Ducato
(2006-2014 /
X250)
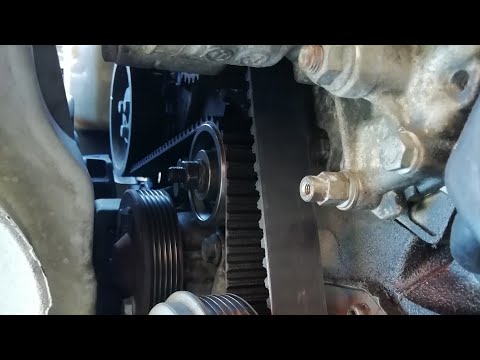
In this very short video tutorial, let's see how to replace the timing belt on a Fiat Ducato produced from 2006 to 2014. This operation is complicate…
Fiat Ducato
(2002-2006 /
)
Replacing the timing belt on a Fiat Ducato? Let's see how to do it. We lift the Ducato on a column bridge and remove the front wheel, using a screwdr…
Fiat Ducato
(2006-2014 /
X250)
Even on Fiat Ducato campers, the diagnostic socket, commonly known as the OBD socket, is present. The OBD socket, on Fiat Ducato campers produced fro…
Other guides you may be interested in |
Installation of Upgraded Intercooler Radiator with Pipes
Lift the vehicle on suitable axle stands, remove the front wheels, and then the front bumper and grille. Proceed to remove the front headlights; drain the coolant, remove the intercooler radiator and the hoses connecting it to the intake system. Position the new intercooler radiator in the grille, temporarily securing it with cable ties, and mark with a marker the part of the metal that needs to be removed to allow the new hoses to pass through. Cut the marked portion of metal and apply a gasket to the edge. Remove the inner cover of the bumper and position it near the radiator to identify any interfering parts to eliminate: again, apply a gasket to the edge of the cut. Create brackets for securing the new radiator and proceed with the installation of the connecting pipes from the radiator to the intake, shaping and connecting them appropriately. Finally, reassemble the bumper, headlights, and grille. by ScegliAuto More videos
|
|
For advertising on this site Write to info@scegliauto.com
ScegliAuto is not responsible for any inaccuracy of the data in the lists. To report any inaccuracy or your business (if you own the business in question), please write to info@scegliauto.com
Number of seconds to generate the page: 0.045
(c) ScegliAuto 2026 - info@scegliauto.com - Privacy policy VAT number: IT01247470535 |