
|
Do it yourself
| |||
| ||||


How to Replace the Rear Light of the Fiat Panda 141
Model: Fiat Panda
MK 1, 141
- Years:
1980, 1981, 1982, 1983, 1984, 1985, 1986, 1987, 1988, 1989, 1990, 1991
Video tutorial
Have you had a small accident and need to change the rear light of your Fiat Panda 141? Don't worry, this video tutorial will explain how to do it yourself while saving some money. The first step is to unscrew the three screws that hold it in place. Due to limited space, you will also need to remove the air filter. Once the screws are removed, the light will come out easily from its housing. Always be careful not to damage the various wires and connectors; disconnect them carefully. If you have purchased a second-hand light, it is important not to discard the actuator hook as it may differ from the one fitted to your car. Removing it is very easy as it is press-fitted; just apply some pressure and twist. To fit it into the new light, simply do the same. Finally, install the new light by reversing the procedure.
Updated on 20 July 2026 by ScegliAuto
Related tutorials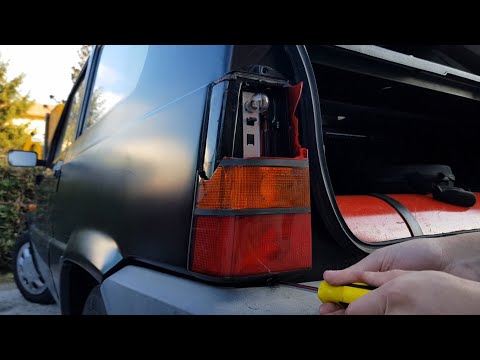
Fiat Panda
(1980-2003 /
MK 1, 141)
Before you start, open the boot of your Fiat Panda. Begin by unscrewing and removing the screws that secure the rear light to the vehicle. Then, dise…

Fiat Panda
(1980-2003 /
MK 1, 141)
In this video, you will see the steps that will allow you to dismantle and replace the rear wiper motor of the first series Fiat Panda 4x4, version 1…

Fiat Panda
(1980-2003 /
MK 1, 141)
In this video tutorial, you will learn how to remove and replace the carpet covering on the floor of the Fiat Panda 141, first series, following the …
Other guides you may be interested in
|
How to Set the Clock on a Renault Master 3
This guide shows you how to set a new time on a Renault Master 3. Start by turning on the instrument cluster of the vehicle without starting the engine. Next, using the end of the right-hand steering column stalk, scroll through the options on the display until you reach 'set time', then press the down arrow button to make the displayed time blink. Once this is done, press and hold the down arrow button to change the hour, which you can adjust using the two arrow buttons at the end of the stalk. Once the correct hour is set, press and hold the down arrow button again to move to the minutes. After setting the correct time, restart the vehicle. by ScegliAuto More videos
|
|
For advertising on this site Write to info@scegliauto.com
ScegliAuto is not responsible for any inaccuracy of the data in the lists. To report any inaccuracy or your business (if you own the business in question), please write to info@scegliauto.com
Number of seconds to generate the page: 0.048
(c) ScegliAuto 2026 - info@scegliauto.com - Privacy policy VAT number: IT01247470535 |
