
|
Do it yourself
| |||
| ||||


How do you remove the dashboard of the Fiat Bravo?
Model: Fiat Bravo
Bravo 2
- Years 2007-2014
To disassemble the dashboard of the Fiat Bravo, you need to start by levering with an object in the central part of the dashboard, so that the molding surrounding the control panel can be detached. The control panel can be removed from its position by unscrewing the fixing bolts and disconnecting the connectors at the back. You can then proceed by removing the steering wheel after unscrewing the rear screw of the airbag and the central nut that secures it to the steering column. By unscrewing the screws that fix the instrument cluster and extracting it, you will be able to remove the entire dashboard panel.
Posted on 17 July 2023 by ScegliAuto
Video tutorial
Related tutorials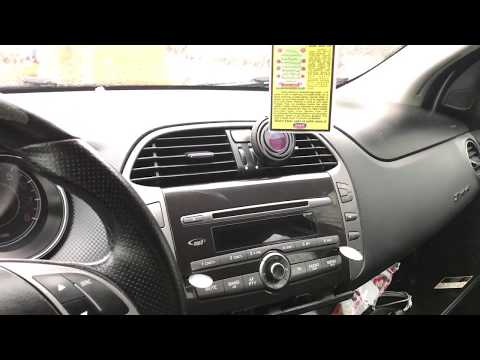
Fiat Bravo
(2007-2014 /
Bravo 2)
How to remove the car radio from inside the dashboard of the Fiat Bravo? Let's see the disassembly of the pieces. We use the original or aftermarket …

Fiat Bravo
(2007-2014 /
Bravo 2)
How to replace a damaged car stereo on a Fiat Bravo? Let's see the disassembly. We use the original metal keys to disassemble the stereo of the Fiat …
Fiat Bravo
(2007-2014 /
Bravo 2)
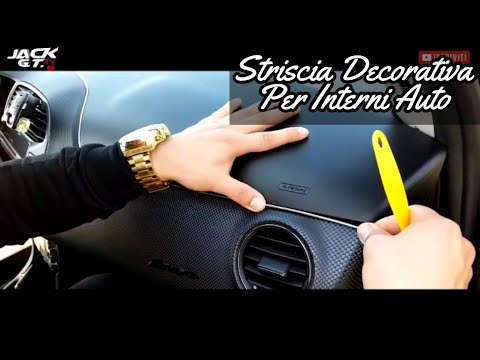
This chrome decoration was applied in the video on a Fiat Bravo, but it is possible to apply it on any car that has a dashboard divided into two halv…
Other guides you may be interested in
|
How to Remove the Brake Disc on Mitsubishi Pajero
How to remove the brake disc along with the brake pads on a Mitsubishi Pajero? First, lift the vehicle on a column lift to a suitable height for working. Next, remove the wheel (using a telescopic spanner or air drill) with the respective bolts. Undo the locking bolt of the brake caliper, and remove it from the caliper support. Remove the caliper support from the wheel hub using a socket spanner. Once the brake disc is free, undo the screws with a fixed spanner and detach the disc from the wheel hub. Disconnect the various wiring and brake fluid pipes from the wheel assembly. Replace them with new parts (always use original and compliant parts). Prepare to install the new disc along with the respective pads, brake caliper, caliper support, etc. by ScegliAuto More videos
|

|
For advertising on this site Write to info@scegliauto.com
ScegliAuto is not responsible for any inaccuracy of the data in the lists. To report any inaccuracy or your business (if you own the business in question), please write to info@scegliauto.com
Number of seconds to generate the page: 0.086
(c) ScegliAuto 2026 - info@scegliauto.com - Privacy policy VAT number: IT01247470535 |