
|
Do it yourself
| |||
| ||||


Valve Clearance Adjustment
Model: Honda Civic
MK 6
- Years 1995-2001
This operation is very delicate and advisable only for experienced individuals. Remove the left front wheel to access the crankshaft to rotate it to the correct position. Remove the spark plugs and all the head mechanics until the cover protecting the valves is removed. Before proceeding, check the reference mark located on the right side of the cylinder head in line with the timing belt pulley. Using the appropriate feeler gauges, insert them between the adjustment screw and the end of the valve stem. Using a fixed spanner to unscrew the lock nut and a screwdriver, adjust the calibration screw following the maintenance manual instructions meticulously. If this procedure is not performed correctly, it may lead to engine malfunction. Move the crankshaft to the new position and proceed to adjust the other valves. Continue until all valves are adjusted. Once completed, replace the valve cover gasket and reassemble everything previously removed.
Updated on 5 February 2026 by ScegliAuto
Video tutorial
Related tutorials
Honda Civic
(2012-2015 /
MK 9)
Today, you will learn how to adjust the headlights on the 2013 Honda Civic. To perform this operation, open the bonnet and use a socket wrench to tur…
Honda Civic
(2006-2012 /
MK 8)
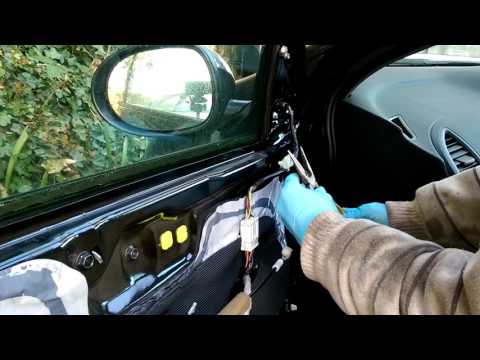
Dismantling the rear-view mirror of the Civic? Remove the door panel to disconnect the electrical connector attached to the mirror. Use a lever to re…

Honda Civic
(2006-2012 /
MK 8)
In this tutorial, see how to adjust the headlights on a Honda Civic, a very simple and quick operation. First, park the vehicle in front of a light-c…
Other guides you may be interested in
|
How to Open the Bonnet on the Lancia Y
To open the bonnet on this vehicle, follow these simple instructions: first, open the driver's door and locate the lever positioned just below the dashboard, marked with an image of the vehicle with the bonnet open. Pull this lever towards you until you hear a "click" indicating the bonnet is released. Next, exit the cabin and stand in front of the bonnet to disengage the safety catch and complete the opening. To do this, slightly lift the bonnet, locate the yellow lever underneath, and pull it to the left to fully release and open the bonnet. by ScegliAuto More videos
|
|
For advertising on this site Write to info@scegliauto.com
ScegliAuto is not responsible for any inaccuracy of the data in the lists. To report any inaccuracy or your business (if you own the business in question), please write to info@scegliauto.com
Number of seconds to generate the page: 0.102
(c) ScegliAuto 2026 - info@scegliauto.com - Privacy policy VAT number: IT01247470535 |
