
|
Do it yourself
| |||
| ||||


How to Remove the Solenoid Valve from a Honda CR-V
Model: Honda CR-V
MK 3
- Years 2007-2012
Learn how to remove and replace the solenoid purge valve on a Honda CR-V. Open the bonnet, lift it, and secure it. Use a socket to undo the fastening bolts of the solenoid valve (located in the engine bay), then remove the valve from its seat and disconnect the power connector using your hands or needle-nose pliers. After comparing the damaged valve with the new one, install it onto the engine block in the bay, tighten it securely with the bolts, and reconnect the connector. Test the vehicle to ensure proper operation.
Updated on 25 February 2026 by ScegliAuto
Video tutorial
Related tutorials
Honda CR-V
(2007-2012 /
MK 3)
The instructions provided in this guide will show us the process of replacing and cleaning the EGR valve of the Honda CR-V. First, we open the hood o…

Honda CR-V
(2007-2012 /
MK 3)
Is the air sensor (mass air flow sensor) in the engine bay not working anymore? Here’s how to properly remove and replace the air temperature sensor …
Honda CR-V
(2007-2012 /
MK 3)
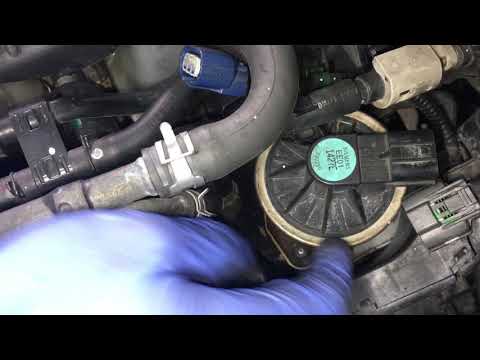
In this video tutorial, you will see how to remove and replace (or clean) the EGR valve on the Honda CR-V third generation, with a 2.2 Diesel engine.…
Other guides you may be interested in
|
How to Open the Bonnet on the Lancia Y
To open the bonnet on this vehicle, follow these simple instructions: first, open the driver's door and locate the lever positioned just below the dashboard, marked with an image of the vehicle with the bonnet open. Pull this lever towards you until you hear a "click" indicating the bonnet is released. Next, exit the cabin and stand in front of the bonnet to disengage the safety catch and complete the opening. To do this, slightly lift the bonnet, locate the yellow lever underneath, and pull it to the left to fully release and open the bonnet. by ScegliAuto More videos
|

|
For advertising on this site Write to info@scegliauto.com
ScegliAuto is not responsible for any inaccuracy of the data in the lists. To report any inaccuracy or your business (if you own the business in question), please write to info@scegliauto.com
Number of seconds to generate the page: 0.074
(c) ScegliAuto 2026 - info@scegliauto.com - Privacy policy VAT number: IT01247470535 |
