
|
Do it yourself
| |||
| ||||



How to Replace the Front Brake Pads on a Hyundai i10
Model: Hyundai I10
PA, MK 1
- Years:
2007, 2008, 2009, 2010, 2011, 2012, 2013
Video tutorial
In this video tutorial, you can see how to replace the front brake pads on a Hyundai i10: the first step is to purchase high-quality brake pads from an authorised dealer. Next, lift the front of the car and secure it with a jack. Now remove the wheel; once the wheel is off, take off the caliper using a 12mm socket wrench. After unscrewing the bolts, lift the caliper and support it so it doesn't fall. Now remove the worn brake pads. Install the new brake pads using the appropriate clips provided. Once both new pads are installed, push back the piston, as the new pads require more space. To push back the piston, there is a special tool (if you don't have the proper tool, you can use a hammer to carefully push back the piston, ensuring that the brake fluid reservoir isn't too full before doing so; if there is too much fluid, you can remove some with a syringe). Importantly, before lowering the caliper, pull back the bushing and ensure the spring is positioned correctly. Now you can tighten the caliper bolt and reattach the wheel.
Updated on 5 August 2026 by ScegliAuto
Related tutorials
Hyundai I10
(2007-2013 /
PA, MK 1)
Is the front bumper broken? Remove it from the front of a Hyundai i10. Lift the bonnet and secure it. Use a socket spanner to undo the fastening scre…

Hyundai I10
(2013-2020 /
MK 2, IA)
Replacing the left front headlight bulb on the Hyundai I10 is a very simple operation, easily done independently, thanks to our short video tutorial …
Hyundai I10
(2007-2013 /
PA, MK 1)
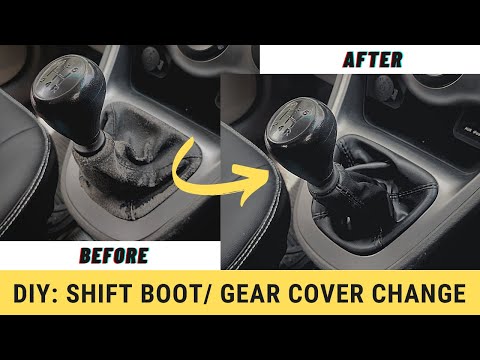
Before you can start, sit in the driver’s seat of your Hyundai I10. Begin by firmly grasping the gear knob with your hand. Then, unscrew the gear kno…
Other guides you may be interested in
|
How to Reset the Tire Pressure Light on a MG ZS?
On the instrument cluster of the MG ZS, the tire pressure light that appears can be reset by inflating the tires to the correct pressure: this value will be indicated on the sticker attached to the driver's door pillar. Once the tires have been properly inflated, you can turn on the instrument cluster and navigate through the menu until you find the option that indicates tire pressure: if this screen shows the new values, the light will turn off; otherwise, you will need to drive for a few miles so that the sensors can read the new values and turn off the light afterward. by ScegliAuto More videos
|
|
For advertising on this site Write to info@scegliauto.com
ScegliAuto is not responsible for any inaccuracy of the data in the lists. To report any inaccuracy or your business (if you own the business in question), please write to info@scegliauto.com
Number of seconds to generate the page: 0.037
(c) ScegliAuto 2026 - info@scegliauto.com - Privacy policy VAT number: IT01247470535 |
