
|
Do it yourself
| |||
| ||||


Installation of the Drum and Shoes. Part 2/2
Model: Nissan Pathfinder
MK 1, Wd21
- Years:
1986, 1987, 1988, 1989, 1990, 1991, 1992, 1993, 1994, 1995
Video tutorial
Once the drum is removed, connect the lever attached to one shoe to the spring on the element behind the wheel fixing disc. Position the two shoes carefully, ensuring the holes align with those on the drum in the wheel. To fit them, use a special tool and the appropriate spanner. Now fit the springs, using a simple pliers, that connect the two shoes. You can now fit the drum cover, aligning the holes with the bolts on the wheel disc. Fit the tyre and lower the vehicle using the jack. The maintenance operation was performed on a Nissan Pathfinder.
Updated on 20 February 2026 by ScegliAuto
Related tutorials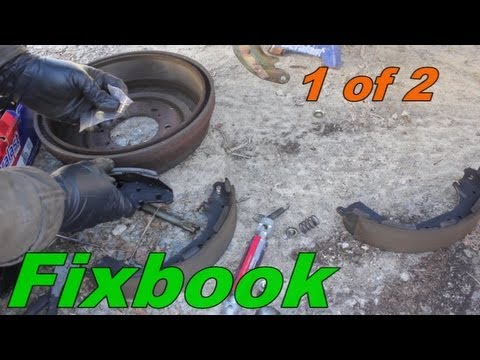
Nissan Pathfinder
(1986-1995 /
MK 1, Wd21)
To replace the rear brake shoes, loosen the wheel nuts before lifting the vehicle; then place the jack under the differential and position the car on…

Nissan Pathfinder
(1996-2004 /
MK 1, R50)
Hello, in this video, you will learn how to change the anti-roll bar on your Nissan Pathfinder. Start by removing the wheels from your car. Raise it …

Nissan Pathfinder
(2005-2012 /
MK 3, R51)
Since the invention of the radio (and later stereos), they have been integrated into cars, initially as an expensive option. Now, they are practicall…
Other guides you may be interested in
|
How to Remove the Rear Seat of a Hyundai Tucson?
To remove the rear seat of a Hyundai Tucson, follow these steps. Start by moving the front seats to their most forward position to gain space. Next, locate the release lever on the underside of the rear seat, near the floor. Press this lever down while pulling the seat upwards to unlock it from the anchor pins. Once unlocked, tilt the seat upwards and forwards to remove it from its position. Repeat this process for both sides of the rear seat. Be careful of any electrical cables or components that may be connected to the seat during removal. Once the rear seat is removed, the disassembly is complete. by ScegliAuto More videos
|
|
For advertising on this site Write to info@scegliauto.com
ScegliAuto is not responsible for any inaccuracy of the data in the lists. To report any inaccuracy or your business (if you own the business in question), please write to info@scegliauto.com
Number of seconds to generate the page: 0.015
(c) ScegliAuto 2026 - info@scegliauto.com - Privacy policy VAT number: IT01247470535 |
