
|
Do it yourself
| |||
| ||||


How do you reset the tire anomaly in the Opel Astra K?
Model: Vauxhall Astra
Astra K
- Years:
2015, 2016, 2017, 2018, 2019, 2020, 2021, 2022
Video tutorial
It is electronic sensors installed on the tires that warn us if something is wrong with the inflation pressure and send a warning to the control unit, which lights up the warning light on the instrument panel. Regarding the Opel Astra K, let's see how to reset it, assuming that not only the problem has been identified, such as a flat tire, a broken sensor, a simple slight increase in inflation pressure, etc., but above all resolved the error light, taking inspiration from the video guide presented here: turn on the instrument panel, press Menu on the left lever of the steering wheel to display the various available options, use the scroll wheel to select the Tire option and when we see, in the onboard computer, the image of the vehicle with the inflation pressure values, press the button at the end of the lever to confirm. Warning light off.
Posted on 30 March 2025 by ScegliAuto
Related tutorials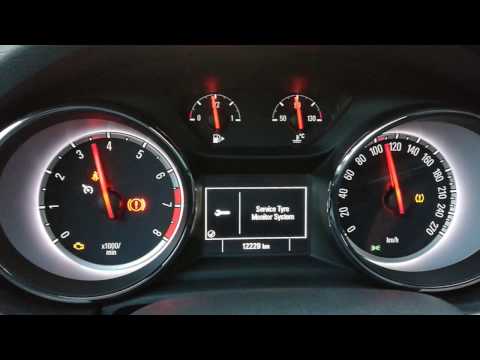
Vauxhall Astra
(2015-2022 /
Astra K)
To reset the tyre pressure warning light on the Opel Astra, inflate the deflated tyres to the recommended pressure. The correct inflation pressure is…

Vauxhall Astra
(2009-2016 /
Astra J)
On the Opel Astra, to reset the tyre pressure warning light, you first need to inflate the tyres to the correct pressure value: this value is indicat…

Vauxhall Astra
(2021-2026 /
Astra L)
The tyre pressure of any vehicle must be within the manufacturer's specified values to prevent the warning light from illuminating, usually found on …
Other guides you may be interested in
|
How to Remove the Rear Seat of a Hyundai Tucson?
To remove the rear seat of a Hyundai Tucson, follow these steps. Start by moving the front seats to their most forward position to gain space. Next, locate the release lever on the underside of the rear seat, near the floor. Press this lever down while pulling the seat upwards to unlock it from the anchor pins. Once unlocked, tilt the seat upwards and forwards to remove it from its position. Repeat this process for both sides of the rear seat. Be careful of any electrical cables or components that may be connected to the seat during removal. Once the rear seat is removed, the disassembly is complete. by ScegliAuto More videos
|
|
For advertising on this site Write to info@scegliauto.com
ScegliAuto is not responsible for any inaccuracy of the data in the lists. To report any inaccuracy or your business (if you own the business in question), please write to info@scegliauto.com
Number of seconds to generate the page: 0.043
(c) ScegliAuto 2026 - info@scegliauto.com - Privacy policy VAT number: IT01247470535 |
