
|
Do it yourself
| |||
| ||||


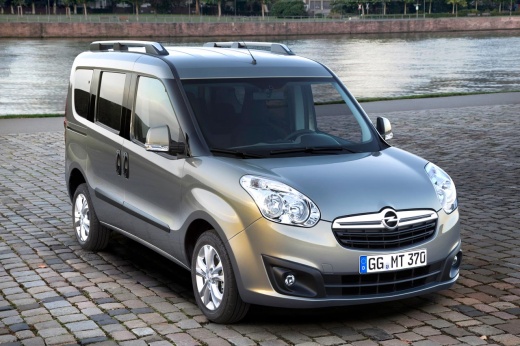
How to replace the battery of the Opel/Vauxhall Combo
Model: Vauxhall Combo
MK 4, Combo D
- Years:
2012, 2013, 2014, 2015, 2016, 2017, 2018
Video tutorial
Let's see how to replace the battery of the Opel/Vauxhall Combo. Remember that by disconnecting the battery, the radio will then ask us for the access code, so let's prepare it so that we are not caught unprepared to restart the radio. Open the hood and remove the rubber seal from the compartment partition; mark the position of the brushes and then remove the arms (it is sufficient to remove the cover and then the bolt underneath). Disconnect the windshield washer nozzle and remove the cable, then extract the deflector at the base of the windshield. Now we have the space to remove the battery, start by disconnecting the negative pole, then the positive one, then remove the bolt that secures the battery to the frame, and finally lift the battery and place the new one in its place; tighten the clamp, connect the poles starting with the negative one and finally the positive one - after spreading the poles with vaseline - and reposition the rain grate; reassemble the windshield washer tubes and wiper arms, being careful with the positioning, reposition the sealing strip.
Posted on 13 May 2025 by ScegliAuto
Related tutorials
Vauxhall Combo
(2001-2011 /
MK 3, Combo C)
In this tutorial, you will see how to replace the battery in the Opel Combo van, a very simple and quick operation. First, ensure that the key is not…

Vauxhall Combo
(2001-2011 /
MK 3, Combo C)
Through this very short tutorial today you will be able to see the necessary procedure to replace the battery of the remote control of a third series…

Vauxhall Combo
(2019-2026 /
Combo E, MK 5)
Replacing the battery of your Opel Combo key (year 2020) is very simple. To complete the operation correctly, just follow the procedure described in …
Other guides you may be interested in
|
How to Remove the Rear Seat of a Hyundai Tucson?
To remove the rear seat of a Hyundai Tucson, follow these steps. Start by moving the front seats to their most forward position to gain space. Next, locate the release lever on the underside of the rear seat, near the floor. Press this lever down while pulling the seat upwards to unlock it from the anchor pins. Once unlocked, tilt the seat upwards and forwards to remove it from its position. Repeat this process for both sides of the rear seat. Be careful of any electrical cables or components that may be connected to the seat during removal. Once the rear seat is removed, the disassembly is complete. by ScegliAuto More videos
|
|
For advertising on this site Write to info@scegliauto.com
ScegliAuto is not responsible for any inaccuracy of the data in the lists. To report any inaccuracy or your business (if you own the business in question), please write to info@scegliauto.com
Number of seconds to generate the page: 0.074
(c) ScegliAuto 2026 - info@scegliauto.com - Privacy policy VAT number: IT01247470535 |
