
|
Do it yourself
| |||
| ||||


How to adjust the clock of the instrument panel and onboard computer of the Opel Astra
Model: Vauxhall Astra
Astra H
- Years 2004-2010
Today we will see how to set the clock on the board computer on the instrument panel of the Opel Astra model h, produced from 2004 to 2010 independently. To set the clock, we need to press the menu button and access the vehicle settings. Select the settings icon and then the "set time" option. Adjust the clock using the arrow buttons on the steering wheel. In addition to setting the clock, we can also set the automatic time change and decide whether to display the time format in 12 or 24 hours. After setting the clock, return to the main menu and restart the instrument panel.
Posted on 20 November 2025 by ScegliAuto
Video tutorial
Related tutorials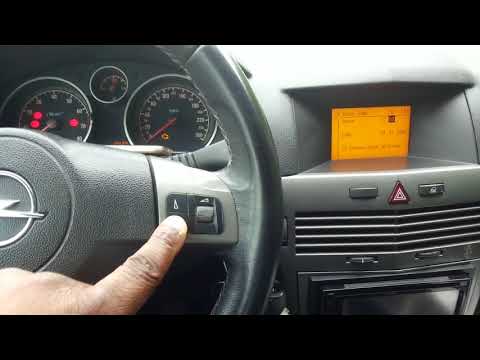
Vauxhall Astra
(2004-2010 /
Astra H)
Adjusting the clock on the multifunction display of an Opel Astra, model H, is a simple and quick operation, which can be done independently thanks t…

Vauxhall Astra
(2009-2016 /
Astra J)
This guide explains how to set the time on the Opel Astra instrument cluster independently. Turn on the instrument cluster and press the "setting" bu…

Vauxhall Astra
(2009-2016 /
Astra J)
Setting the clock in the Opel Astra J is straightforward, as it is manageable DIY and via the buttons on the dashboard, so there is no need to connec…
Other guides you may be interested in
|
Frequently Asked QuestionsHow to Open the Bonnet on the Lancia Y
To open the bonnet on this vehicle, follow these simple instructions: first, open the driver's door and locate the lever positioned just below the dashboard, marked with an image of the vehicle with the bonnet open. Pull this lever towards you until you hear a "click" indicating the bonnet is released. Next, exit the cabin and stand in front of the bonnet to disengage the safety catch and complete the opening. To do this, slightly lift the bonnet, locate the yellow lever underneath, and pull it to the left to fully release and open the bonnet. by ScegliAuto More videos
|
|
For advertising on this site Write to info@scegliauto.com
ScegliAuto is not responsible for any inaccuracy of the data in the lists. To report any inaccuracy or your business (if you own the business in question), please write to info@scegliauto.com
Number of seconds to generate the page: 0.116
(c) ScegliAuto 2026 - info@scegliauto.com - Privacy policy VAT number: IT01247470535 |
