
|
Do it yourself
| |||
| ||||


How to install an Android radio in an Opel Astra H
Model: Vauxhall Astra
Astra H
- Years 2004-2010
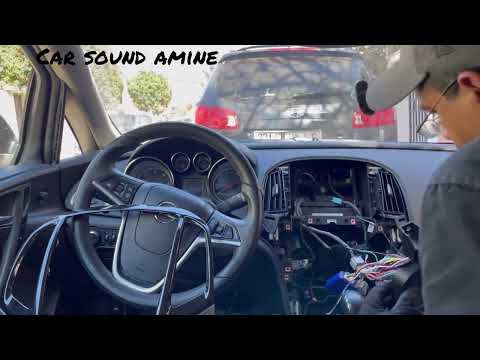
To install an Android radio in an Opel Astra, you need a radio with cables, an adapter frame, and a CANBUS unit (essential for maintaining steering wheel controls and automatic ignition). Start by removing the old radio by inserting 4 thin points into the holes of the original radio; disconnect the rear cables. Remove the climate controls, take off the central trim by unscrewing the two screws at the bottom, and remove the original screen by disconnecting the cables inside. From the new unit, connect the main wiring to the car's original socket. Connect the CANBUS and route the USB cables to the glove compartment area. Fit the new frame in the upper slot, connect the antennas (GPS, 4G, WI-FI) at the back of the radio. For the FM antenna, connect the adapter with the amplifier, joining the blue ANT cable to the blue power cable. Secure the radio to the frame with the provided screws, then configure the CANBUS by going to settings/device/select the model of the car/CANBUS setting/set: CANBUS LZ/model Opel/Astra/011 remove screen. This way, the steering wheel controls will work.
Posted on 30 April 2026 by ScegliAuto
Video tutorial
Related tutorials
Vauxhall Astra
(2004-2010 /
Astra H)
Installing an Android 7.0 car radio on an Opel Astra H vehicle is a fairly simple operation that can be carried out independently thanks to our video…

Vauxhall Astra
(2004-2010 /
Astra H)
To replace the radio of the Opel Astra, model H, we need to purchase radio removal keys online or at auto parts stores. Insert the removal keys into …
Vauxhall Astra
(2009-2016 /
Astra J)
Follow this brief and simple guide to remove and replace the standard radio with an Android type in the Opel Astra. First, get into the vehicle and s…
Other guides you may be interested in
|
How to Reset the Tyre Pressure Light on the Opel Grandland X
While driving, if you notice the tyre pressure warning light coming on, first check the actual inflation pressure of the tyres and, if necessary, restore the pressures recommended by the manufacturer. After restoring the correct pressures, you need to reset the warning light that has illuminated on the instrument cluster. To do this, locate the reset button on the lower central console. Press this button and hold it down for at least 3 seconds, after which the low pressure indication will turn off. by ScegliAuto More videos
|

|
For advertising on this site Write to info@scegliauto.com
ScegliAuto is not responsible for any inaccuracy of the data in the lists. To report any inaccuracy or your business (if you own the business in question), please write to info@scegliauto.com
Number of seconds to generate the page: 0.292
(c) ScegliAuto 2026 - info@scegliauto.com - Privacy policy VAT number: IT01247470535 |
